Let’s make a Boop Button.
A couple of weeks ago, I saw that Amazon had made their AWS IoT button available. This is the same base hardware they use for their “Dash” buttons, and I thought it might make a fun weekend project to see what I could do with an internet of things button that could be programmed. Plus, who doesn’t want an excuse for a little weekend hacking? It was Maker Faire weekend last week, after all, and I felt inspired. I ordered a couple of the buttons from Amazon for about $20 each. They showed up a couple days later via Amazon Prime.
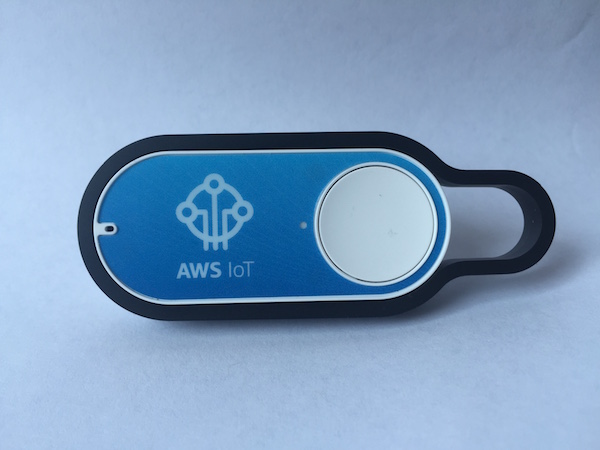
The button itself is pretty much the simplest thing possible; it’s a chunk of plastic about the size of my thumb, with a big white button on it and a tiny LED.
I started thinking about the fun things that could be done with the push of a button. I could control a Philips Hue lightbulb! Or have it play music! Oooh, it could turn on the coffeemaker! Summon a Tesla! Launch a rocket! My imagination went wild for a while. After thinking about it for a bit, I decided to start with something a little more straightforward. I decided to see if I could make it so that when someone pushed the button, the system would send me a text message that said “Boop!”

Here’s everything I needed to do in order to configure the “Boop Button.”
UPDATE #1: I just received a very nice note from Jinesh Varia, who is part of the Amazon AWS developer relations team. They have made a few changes to the process. I’ve included Jinesh’s email at the bottom of the post, which updates Step 3, Step 5 and Step 6. I’ll inline the changes here at a future time when I’ve had a chance to grab screenshots and such.
1. Set up an AWS account
You’ll need an AWS account to use your AWS IoT button. Set up an account here http://aws.amazon.com/. Once you’ve done this, it would be adviseable for you to have a look at some aws cloud monitoring options that can ensure that your cloud computing never runs into any serious issues that could put your data at risk. If you already have a system ready and just want it moved over to use AWS then you can always use a AWS migration service.
2. Understand a few terms
Within the AWS IoT button world, there are a few concepts that it took me a few minutes to wrap my head around regarding a “device,” the associated “certificate and key” and a “policy.” If you don’t have any much knowledge on AWS, I would recommend doing something like this aws certified developer associate practice exam beforehand. AWS can be quite tricky to understand, especially if you’re a beginner, so taking a certified exam might help you out with the gaps in your knowledge.
- Thing (also called a Device) – This is a representation in your AWS account of the IoT button itself.
- Certificate and Key – These are two files you’ll need to secure the interactions between your AWS IoT button and the Amazon AWS service.
- Policy – This is a list of the AWS IoT services that your button should have access to.
Those pieces all work together to form the basis of the infrastructure that your IoT button will talk to. Let’s set them up and get those pieces in place.
3. Configure your device, certificate, key and policy
Go to https://aws.amazon.com/iot/button/ and login to the console. It’s important to note the UI on this page is horrible. There’s a button called “Login to the Console.” Click that one.

Clicking on the “Login to the Console” button will take you to a simple wizard that does a lot of the behind the scenes configuration for you. Fill out the fields on the wizard and click “Generate certificate and keys.”

Important! Download both the certificate file and key file to your computer. You’ll need them in the next step to configure the button itself. Got both the certificate and the key files created and saved locally on your computer? Good. Let’s keep going.
The confirmation screen also should also list “endpoint subdomain” and “endpoint region” information. Write these down. You’ll need them in the next step. They tell your button where to send its information when you press it.
It’s now time to configure the physical button itself.
4. Connect the AWS IoT button to your wifi network
This next part of the process involves configuring the physical button itself. First, you’ll need to disconnect your computer from your primary wifi network and connect the computer to the IoT button in order to configure the button so the button can talk to your primary wifi network.
- Hold down the white button on the IoT button for five to ten seconds until the LED on the IoT button flashes blue. This means the device is now in its configuration mode and it has started up its own wifi network access point.
- Connect your computer to the wifi network that the button created. The network will be named something like “Button ConfigureMe – X99” and it requires a password. The WPA2-PSK password to connect to the button’s wifi network is the last eight digits of the device serial number written on the back of the button.
- Once your computer is connected to the Button ConfigureMe network, go to http://192.168.0.1/index.html. 192-168-1-1 is your router IP address, for more information on what you can do with this, follow that link. The page is a configuration page that the button is serving up from a tiny little web server built into the button itself.
- Fill in your primary wifi connection information on the form, upload the certificate and key from the previous step, and fill in the “endpoint subdomain” and “endpoint region” information you wrote down a moment ago.
At this point, the LED on your IoT button should flash white a number of times, and then it should flash green. The white flash means it’s connecting to your primary wifi network, and the green flash means it was able to connect to the AWS endpoint. This is good! (If you see it flash red, that means that something was misconfigured. Amazon has published a list of what all the IoT button LED codes mean. The Troubleshooting Guide at the bottom of this page explains all the flashing LED codes.)
5. Set up the rule that will fire when the IoT button is pressed
So far so good! Your button now is configured and can send a message to the AWS infrastructure. Now, let’s configure a rule to fire on AWS when it receives the message from your button. This rule will live on the AWS “Lambda” infrastructure, which is their engine for things like this. If you were working through the wizard on the prior step, clicking “next” should take you to the page to set up the function. If for some reason it didn’t you can click here and get to the right page in the wizard to set up the function.
In the first phase of getting the Boop Button to work, pressing the button sends me an email, and then I’ll use that email as a trigger to send me the “Boop!” text message. It’s a simple way to see if I can get all the parts to execute together. This sample function brought up by the wizard sends an email when it receives a message from the IoT button. That’s handy.
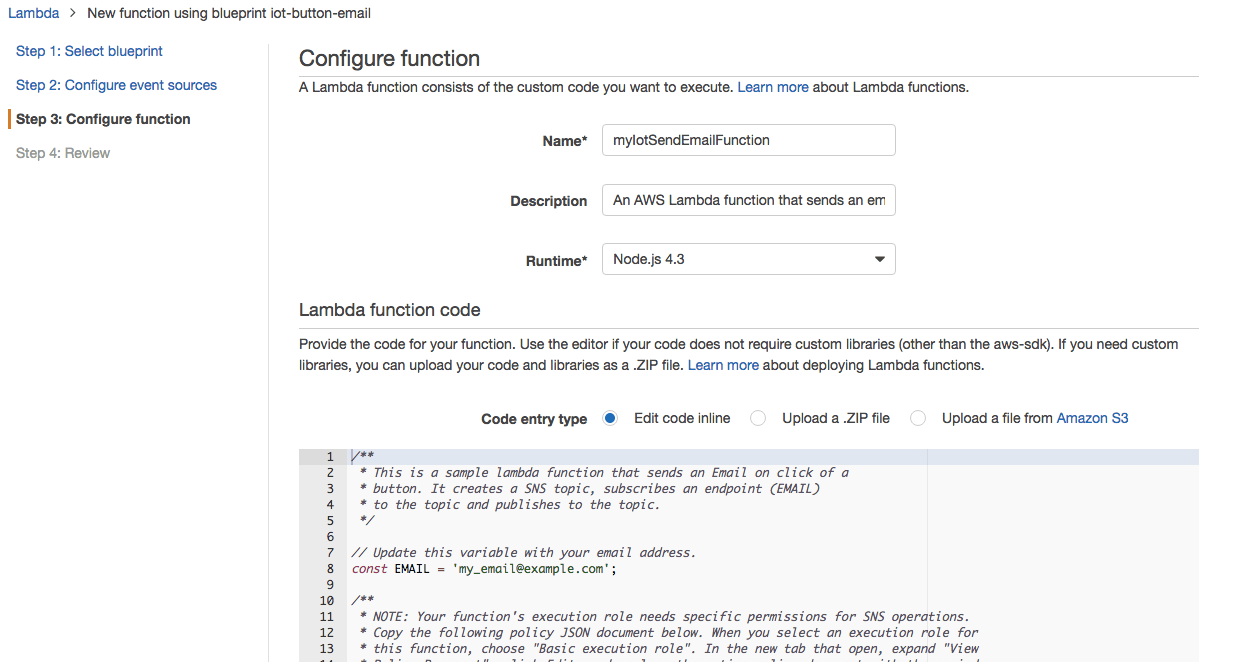
In this step of the wizard, fill in a name for your function, and then make a couple of tweaks to the sample code.
On Line 8, update the constant to the email address you want to receive a message when the IoT button is pressed.
Read lines 10-15 of the sample code carefully. I missed this the first time I did this and it took me forever to figure out what was wrong.
* NOTE: Your function’s execution role needs specific permissions for SNS operations.
* Copy the following policy JSON document below. When you select an execution role for
* this function, choose “Basic execution role”. In the new tab that opens, expand “View
* Policy Document”, click Edit, and replace the entire policy document with the copied
* one. Then, click Allow to create your new execution role.
What this means is copy the JSON object on lines 16-40 and save them for the next step.
Choose “Basic execution role” from the dropdown.
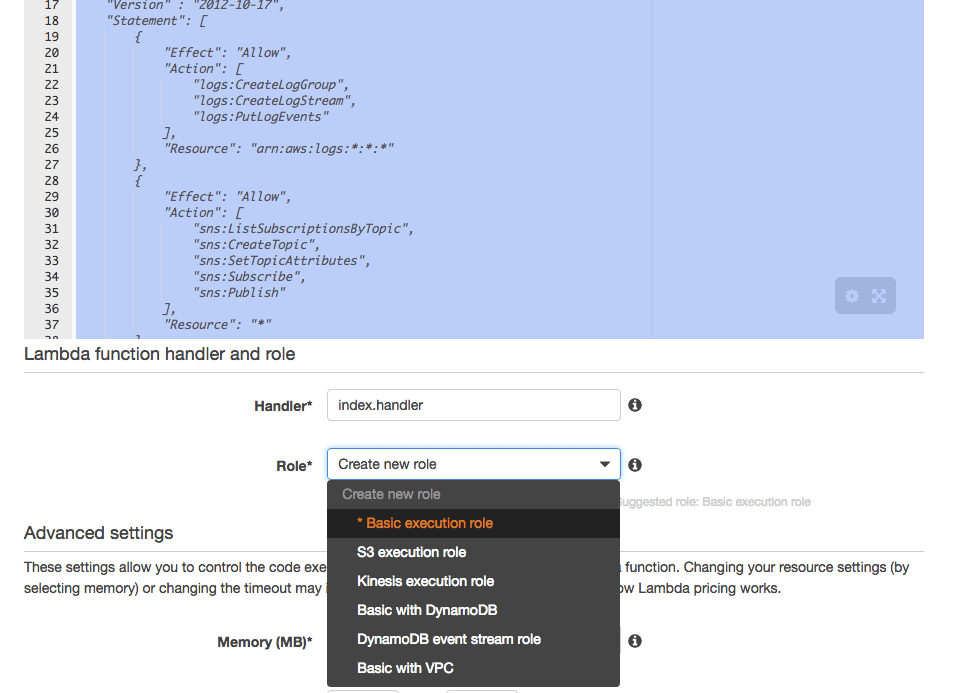
This will open up a new window. In that new window, expand the policy document, choose “Create a new Role Policy” and click “Edit.” Then paste the JSON object you copied a few seconds ago into the box (replacing the original contents of the box), and click “Allow” in the lower right to create the role.

You should see a message that says “Successful” and you should be returned to the screen you were just on.
Click “Next.”
You should now be on a review screen.
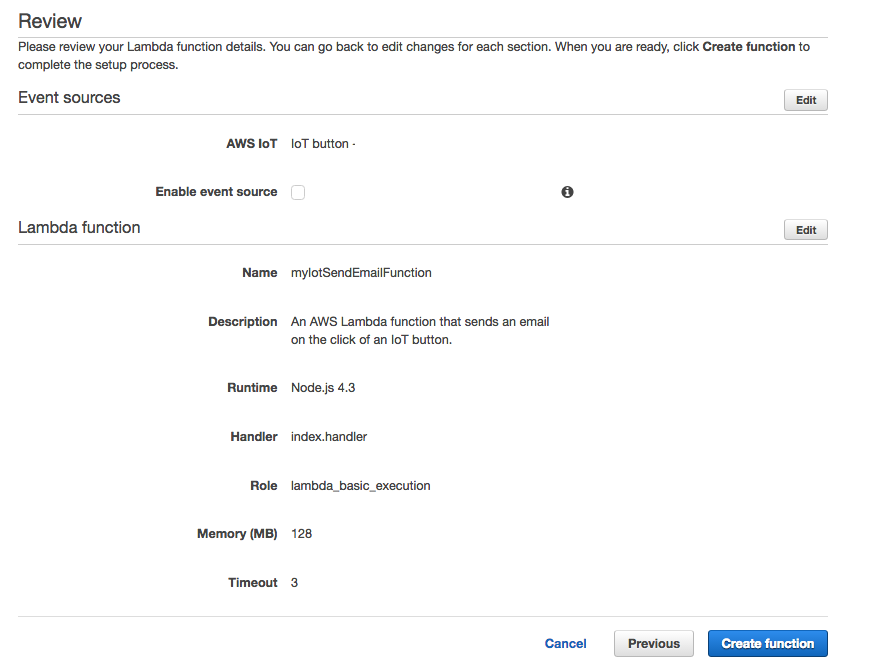
All should look good. Click “Create function.”
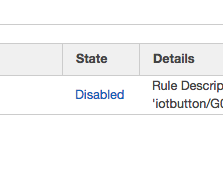
The system will now take you to a screen where you can enable this function. If state is “disabled,” click on the link to toggle the state and enable the function.
6. Test the AWS IoT button
Ok, deep breath. Let the system settle for a minute or two, and now it’s time for the first test. Press the big white button on your IoT button once, like ringing a doorbell. What should happen is the following:
- It should flash white a few times as it connects to your wifi.
- It should then flash green as it sends the message to AWS.
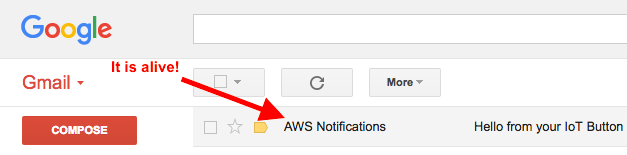
- AWS will execute the function and should send an email.
Let’s see what happened.
Ok, from here on out it’s a cakewalk.
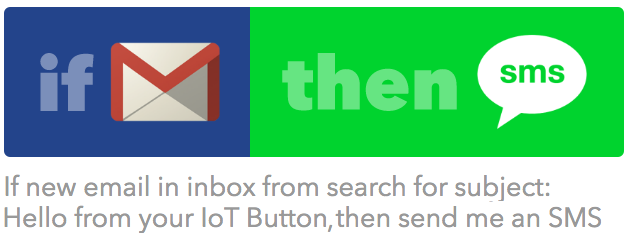
I set up an If This Then That (IFTTT) rule to listen for an email from my IoT button and, if I get that email in my Gmail box, to send me a text.
Let’s see what happens.
I push the button.
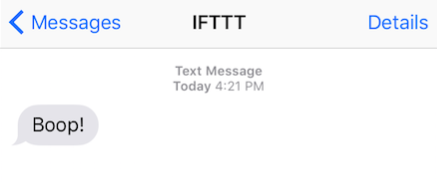
An email shows up in my Gmail, and…I just got a text message. It works!
7. Summary
One thing I learned from getting the Boop Button working is that while the Amazon documentation is technically all there, it’s sometime disjointed and difficult to follow. The key steps are:
- Get an AWS IoT button
- Set up the AWS thing, certificate, key and policy in your AWS account
- Install the certificate and key on the physical AWS IoT button, connect the IoT button to your wifi network and ensure it can connect to AWS
- Set up the rule that will fire when AWS receives the message from the IoT button
The first time through, this took a couple of hours to get everything working. Now that the basics are in place, next enhancement is to see if it’s possible to send an SMS directly from Amazon and not need to go through IFTTT. After that, another future enhancement is to use the IoT button to call other arbitrary functions instead of sending an email.
Boop!
Further reading
While the example above takes one through a wizard that sets up the policy, certificate and key, there is another page that does the same things in a more manual fashion. It took me forever to find this page, and there were a few false starts, but there are some good additional resources here: http://docs.aws.amazon.com/iot/latest/developerguide/iot-console-signin.html
UPDATE #1 (continued):
Here is the note I received from Jinesh at Amazon.
“Hi Christopher,
I work on the AWS IoT Team and currently manage the AWS IoT Button project. I have been at AWS almost 10 years now.
First, Thanks a lot for the excellent blog post. We have sent the reference to multiple customers on how to get started quickly. But most importantly it has helped me and my team to know what we need to fix. In the spirit of customer obsession, primarily driven by your blog post, we have made a few updates that will simplify the getting started experience:
Step 3: you can find the blueprint now in the Lambda console “Create Function” by just typing “button” in the filter box. You will also get this link now in the IoT Console so its easy to find.
Step 5 (most important one): We have updated the console wizard now so the SNS permissions template is pre-selected with the blueprint and long Step 5 is now not needed anymore. This was our biggest pain point today so thanks for giving us the feedback and with the new deployment, developers don’t have to do all the steps.
Step 6: One more way to test the button is to use the MQTT Client in the browser. Subscribe to the topic “iotbutton/+”
Your post is excellent and we will continue to refine and make it even more easier for developers to get started with the button. I would be highly obliged if you can update the post with the above edits so your readers get the most updated information.
I would love your additional feedback if there is any way we can further improve: More blueprints, More easier way to get started, more ideas for developers?
Jin
AWS IoT”
