We’ve all seen the traditional front-and-back tandem bikes, where one person sits in front and the other sits in back. However, a few years ago I went on a brief ride with a friend who brought a side-by-side, “sociable tandem” bike to a retreat we were both at and was fascinated. I saw another one on the playa at Burning Man a few years later.
At their simplest, sociable tandems are bicycles where the riders sit side-by-side. True to the “sociable” moniker, this allows for more interaction between the two riders, as they can easily talk to each other. (Plus, it’s super fun.)
Sociable tandems also let folks who want to ride together but who have different levels of pedal power hang out more easily. The two riders can pedal independently and the more experienced or stronger rider can help the other rider when needed. Also, in contrast to riding independently on two bikes, the slower rider doesn’t get left in the dust.
After looking around and seeing that most of the sociable tandems that were available for sale were both expensive and unwieldy for transport (most were either recumbent bikes, or really large and expensive quadricycles like the “Rhoades Car” or similar), I decided to try to build a sociable tandem using standard bikes and mostly off-the-shelf parts that I could find at my local big-box hardware store. Here are the results.
Start with two identical bikes
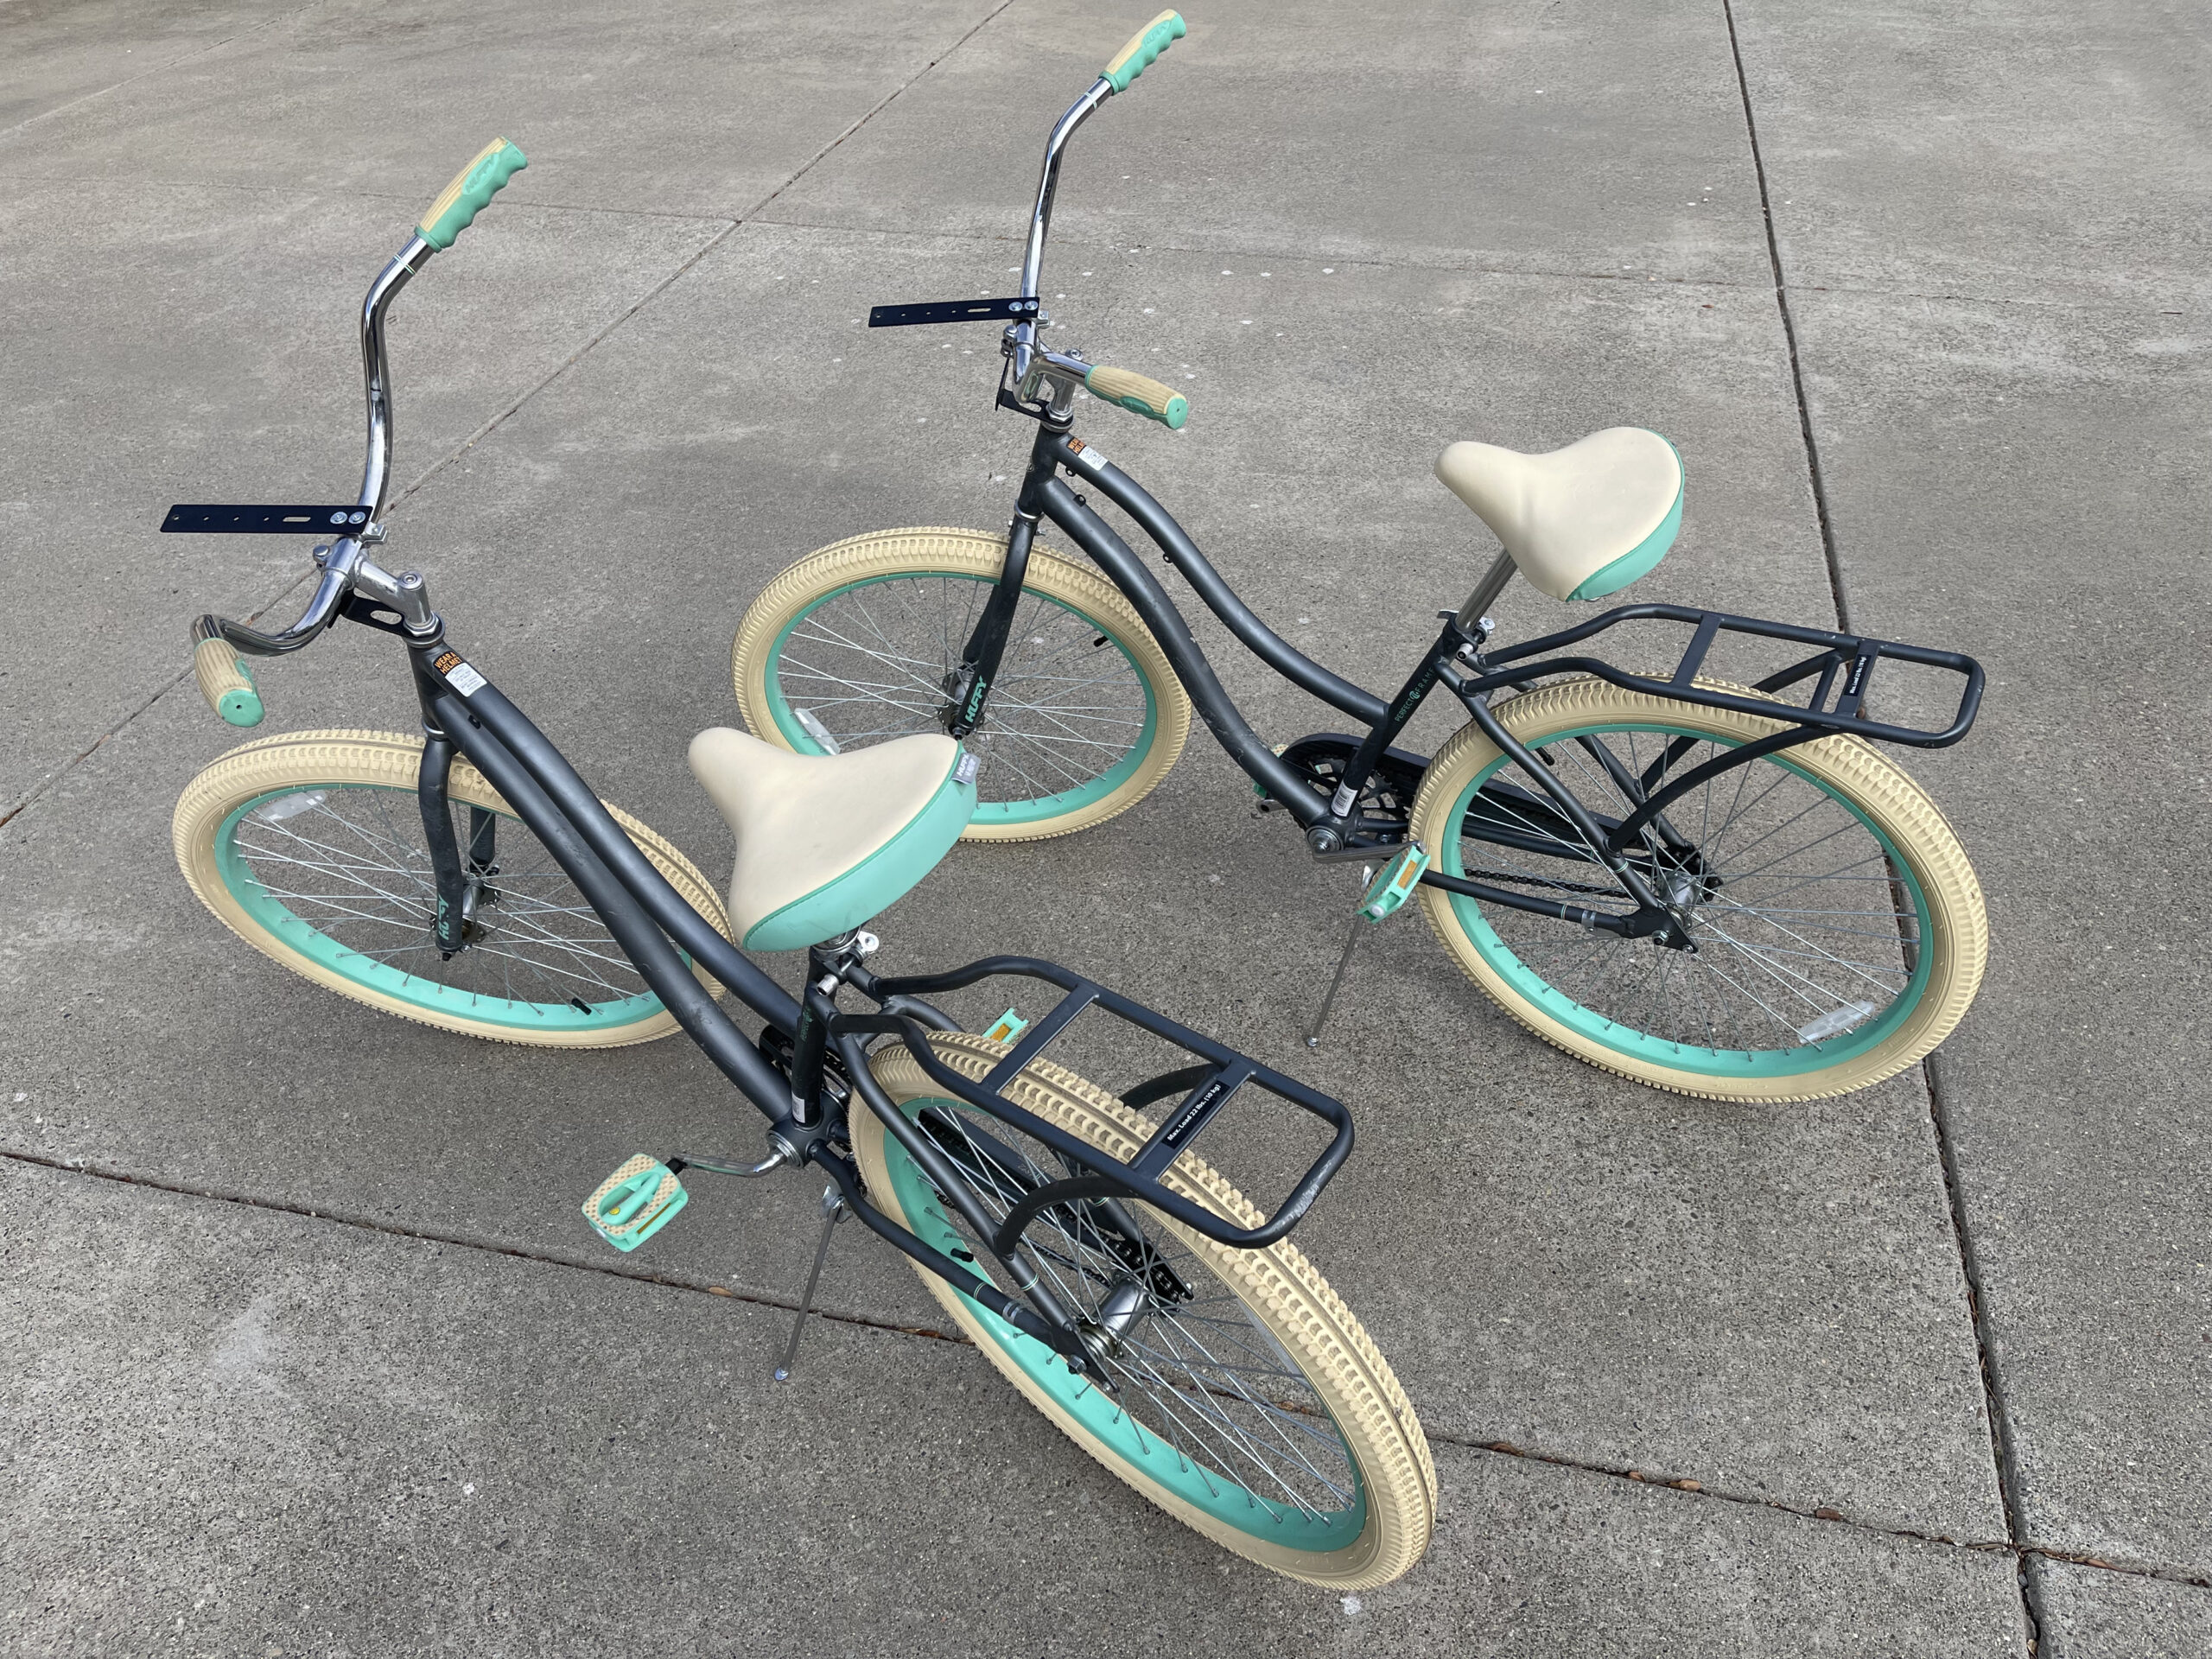
The most important thing is to get two identical bikes. They should be the exact same size and model. You can get these from a resale shop, or if you’re not able to find what you’re looking for already out there, you can get reasonable bikes for about two hundred bucks each at someplace like Target or Wal-Mart. The ones we got were the Huffy Nel Lusso Ladies (step-through) bikes.
This bit is important: Get bikes that have a pre-welded back rack

Make sure you get bikes with a pre-installed, pre-welded back rack. It made construction so much easier, since the main attachment points between the bikes were already set up for us.
The other unexpectedly important benefit of this approach of building with two off-the shelf bikes is that it’s trivial to transport the sociable tandem using a standard rooftop or hitch bike rack. You can transport the bikes independently to where ever you’re going to ride, and then assemble them into their tandem configuration on-site at your destination. Transporting a pair of recumbent bikes or a pre-assembled quadricycle is a pain. With our approach, you just take the bikes to where you want them just like always and turn them into a tandem when you get there.
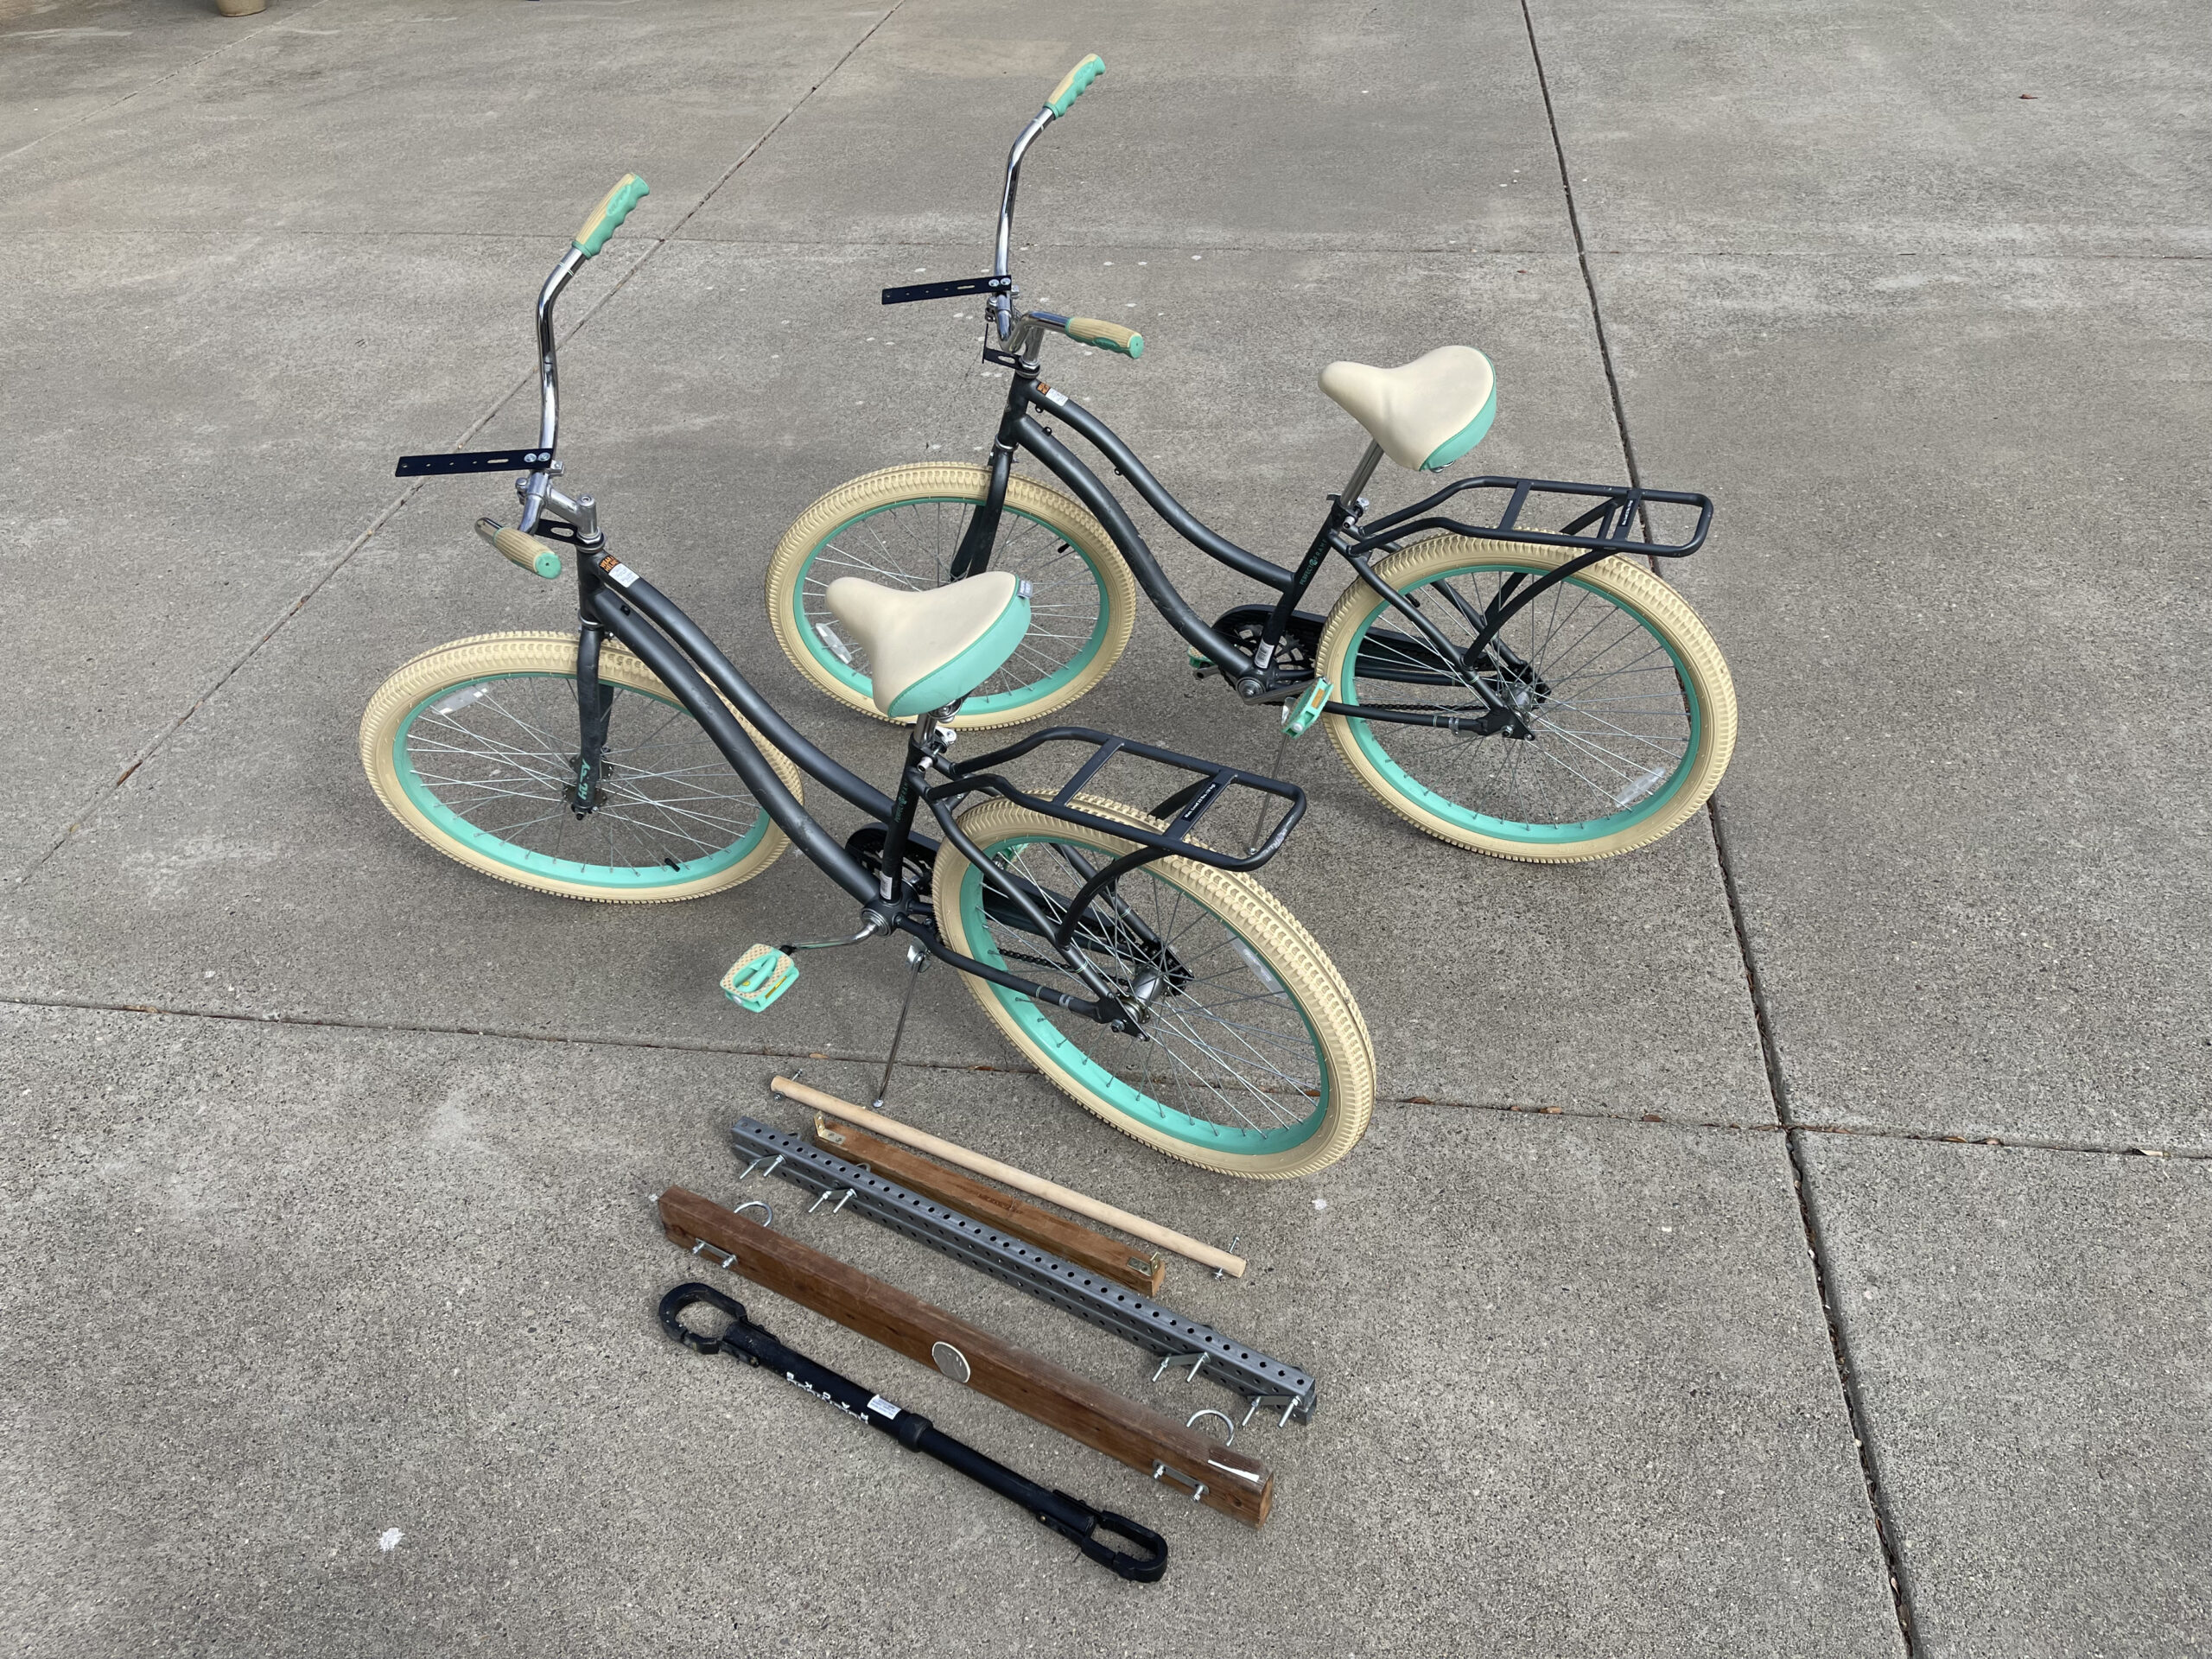
In addition to the bikes, there are only a handful of other items you need, all of which can be procured fairly easily and assembled using regular around-the-house types of tools. We’ll go into all of these in detail later, but at a high-level, you’ll need:
- 2 punched square metal tubes
- 1 piece of 2×4 lumber
- 1 piece of 2×2 lumber
- 1 broom handle or dowel
- 1 bike “top tube” adapter
- 6 U-bolts
- 2 flat brackets with bolts
- 2 angle brackets and screws
Let’s add a little stability to start
When first starting the project, I discovered that there was a product out there for adapting bikes with sloping top tubes that enabled them to be easily transported using bike racks. Normally, you’d use the top tub adapter on a single bike and affix it between the seat post and the front fork to create a “top tube” that’s easier for car bike racks to handle. We’re going to use it a little differently.
For the sociable tandem, connect the top tube adapter between the two bikes at the seat post. This gives a little bit of lateral stability that will let us affix some of the other parts a bit more easily. It should just snap on between the bikes.
You can get this adapter for about $40 or so from a bike shop or online store. We used the Hollywood Racks Bike Adapter Pro, but anything similar to this should work.

Just loop the adapter around the seat post of one bike…
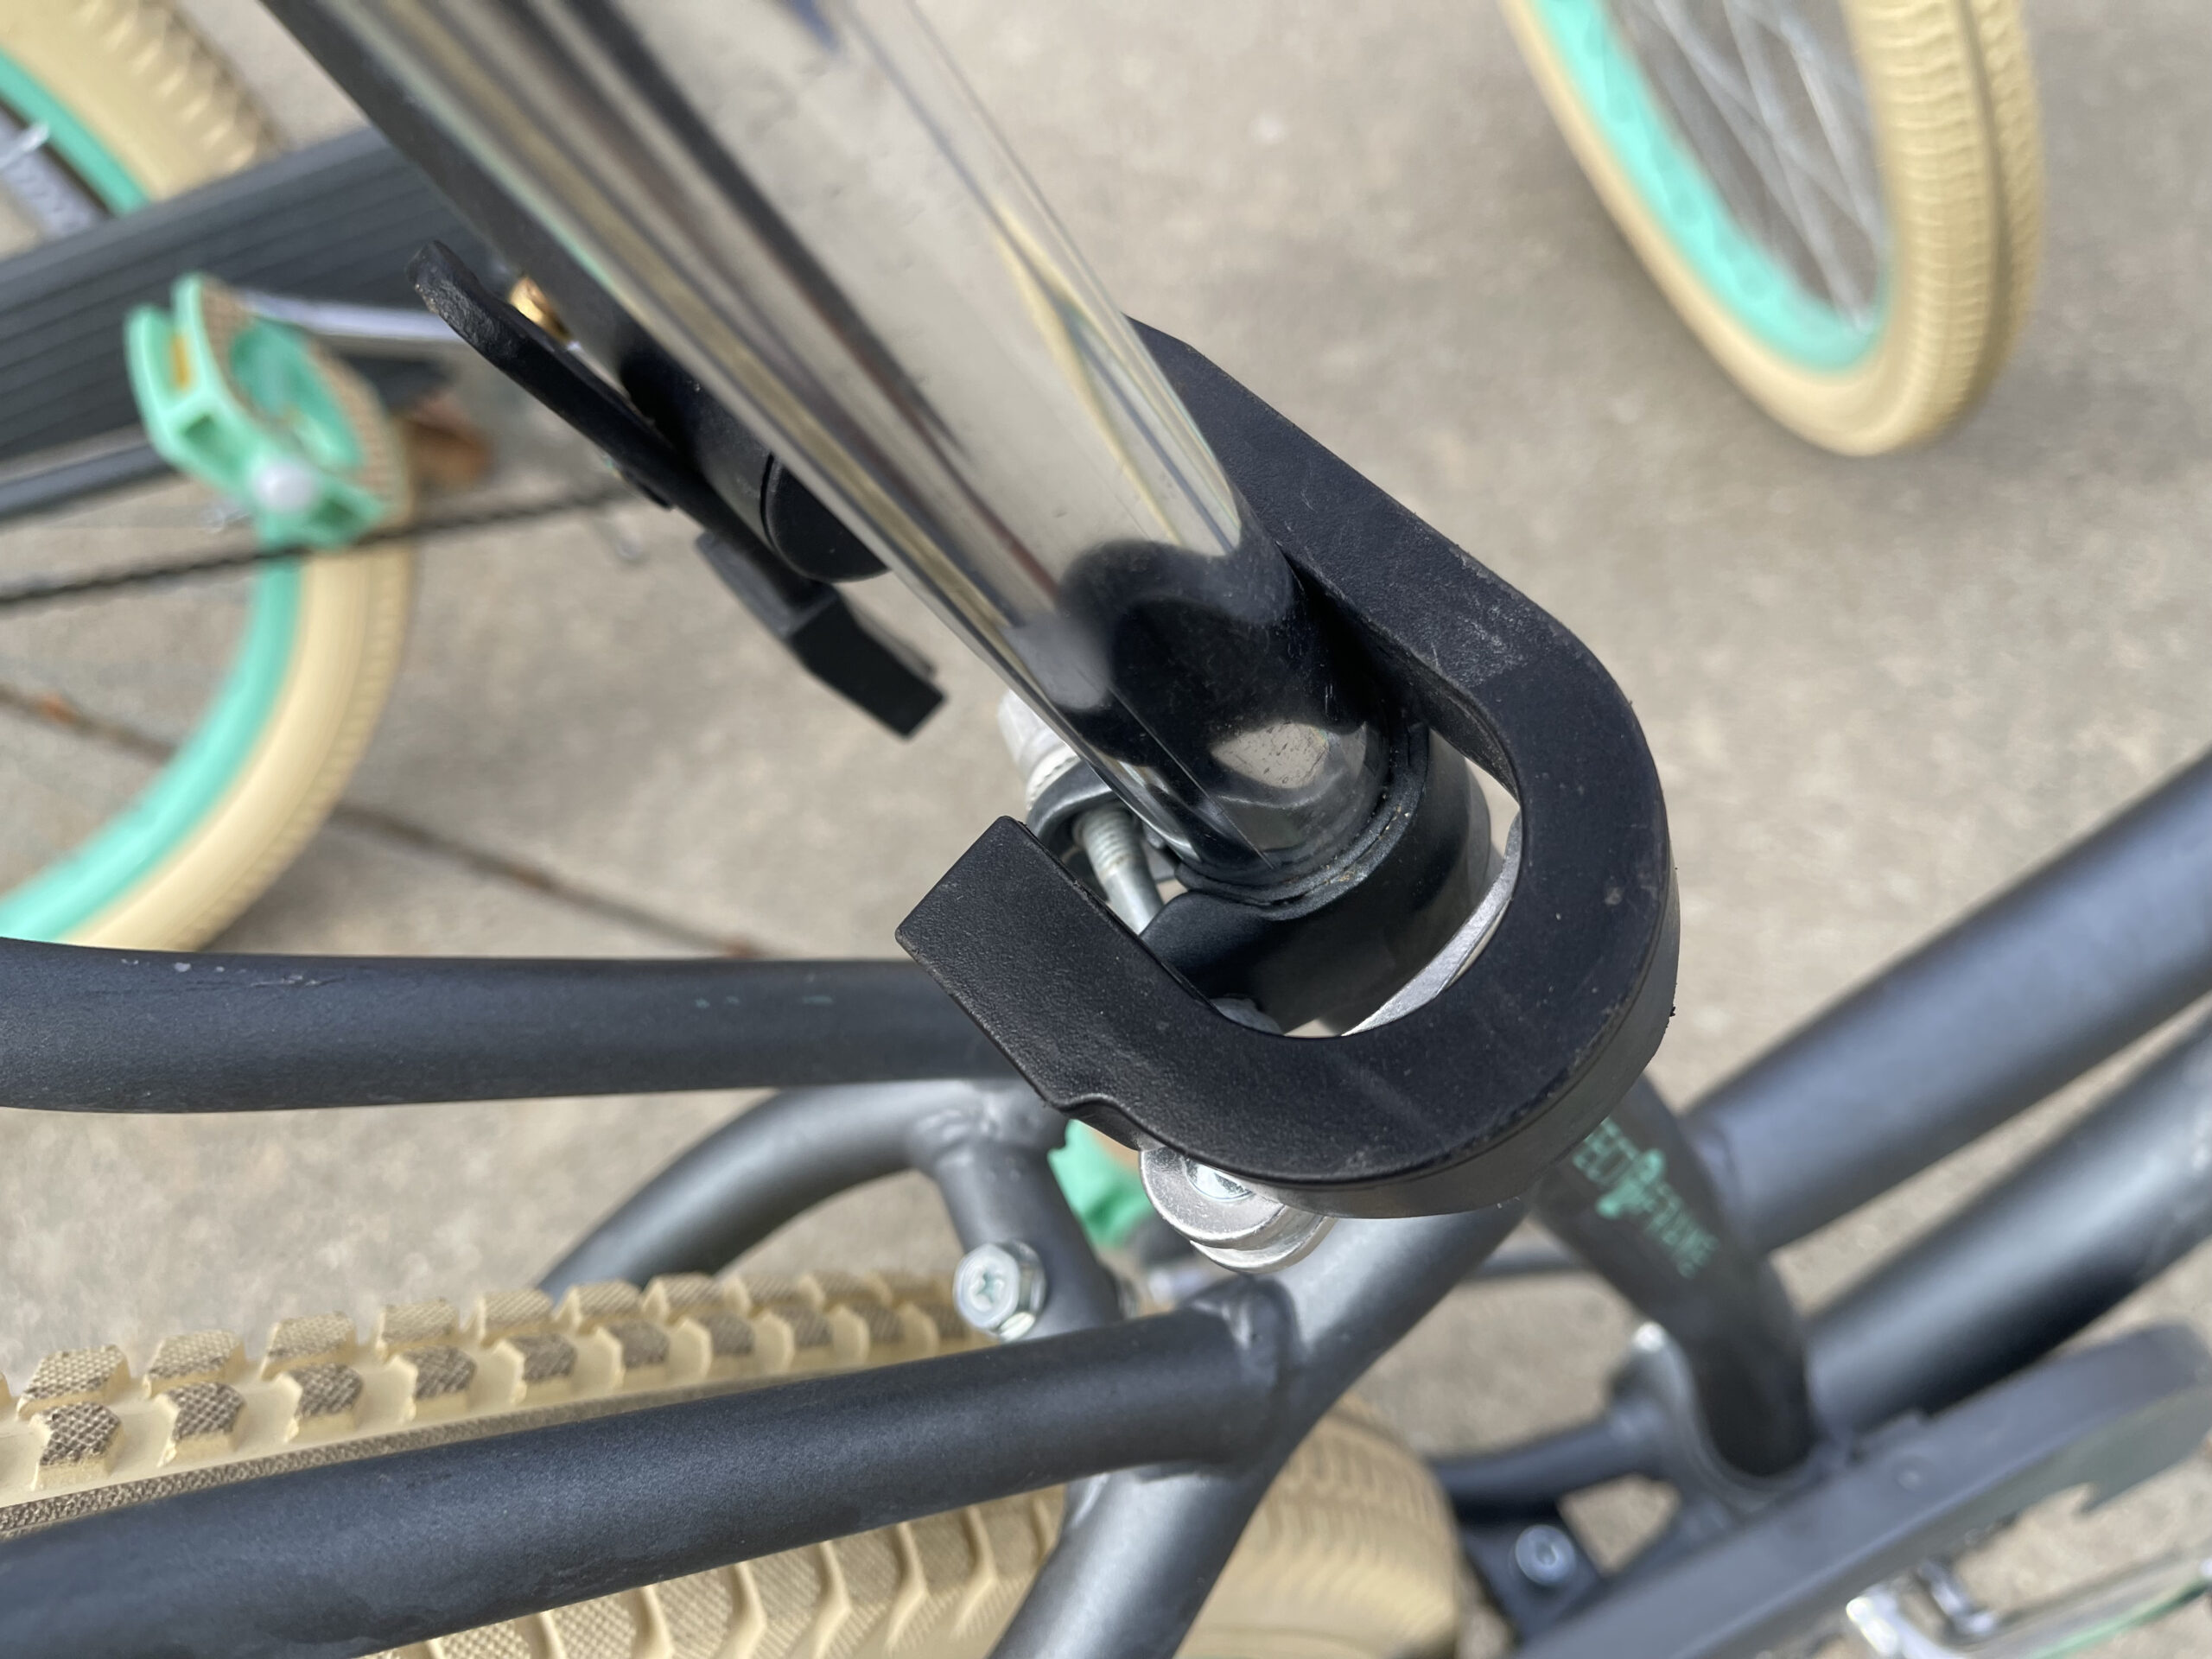
…and then the other.

Make sure the loops are closed on each side.
Ok, that was easy enough. Onto the good stuff.
It’s time for metal
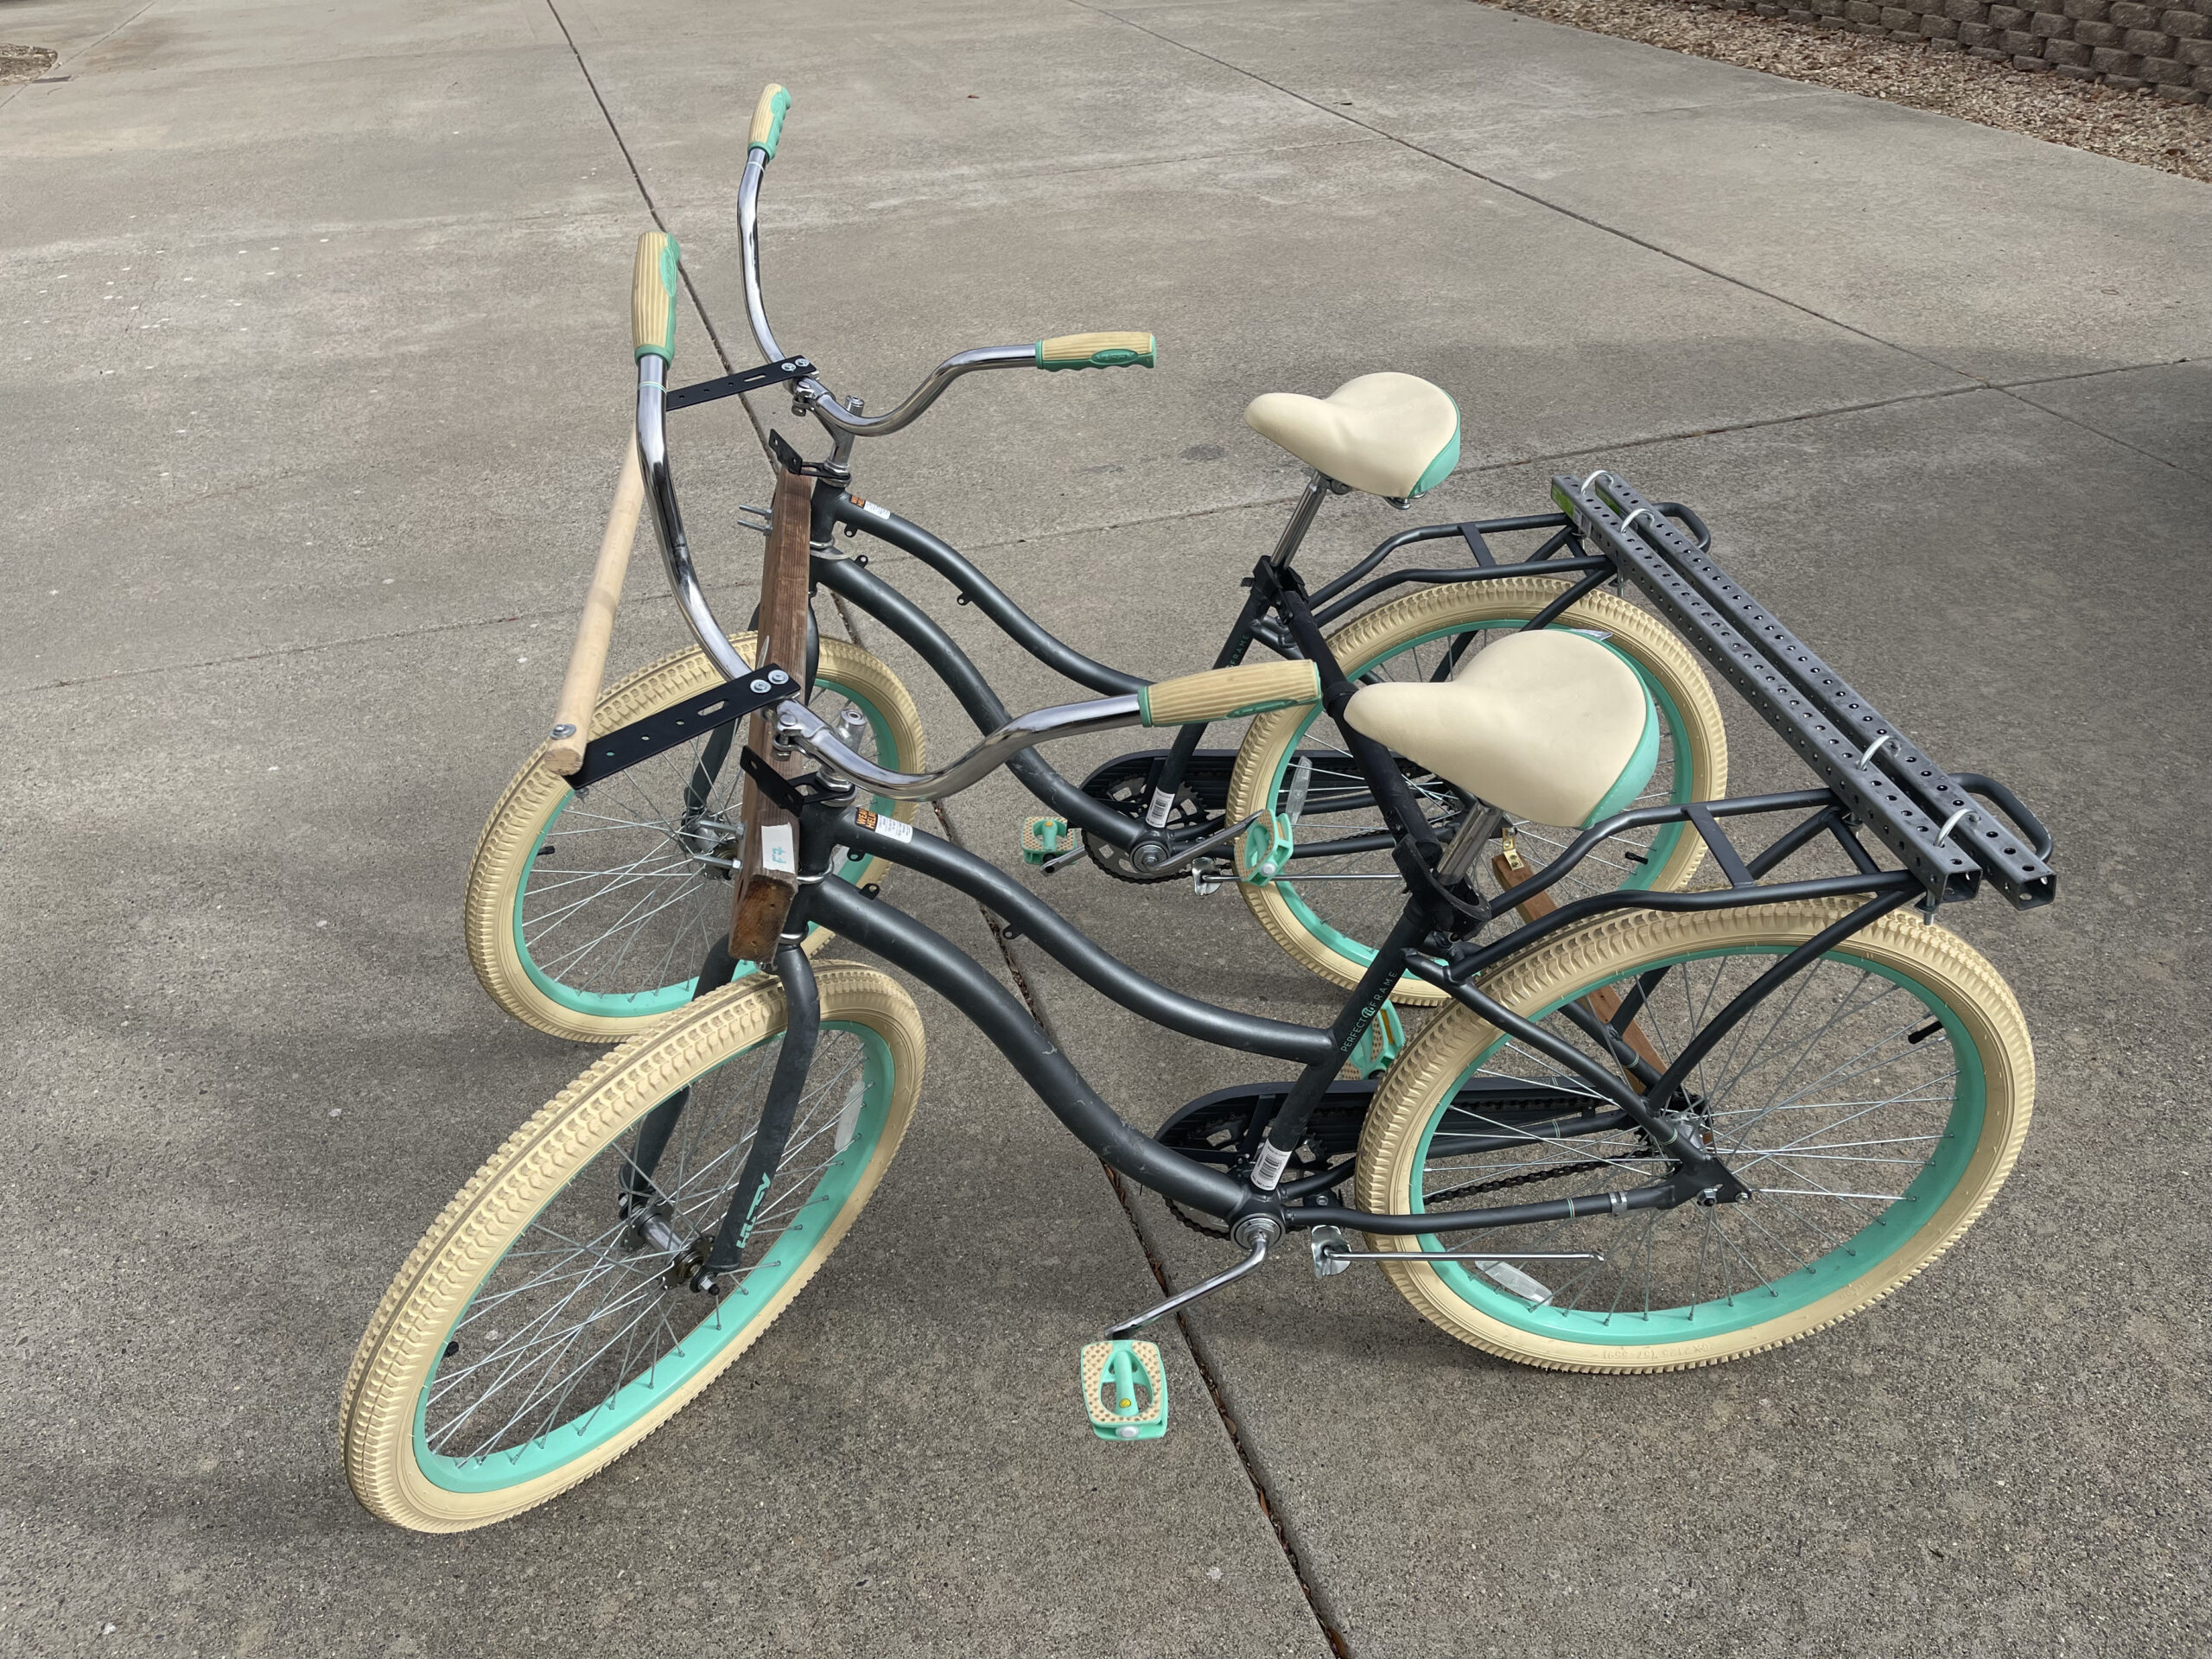
In our prototype v.1 of the social tandem (the photo at the top of this post), we used a big chunk of wood across the back of the two bikes, secured by a ridiculous number of screws and clamps. Don’t do this. It takes forever to assemble or disassemble the tandem.
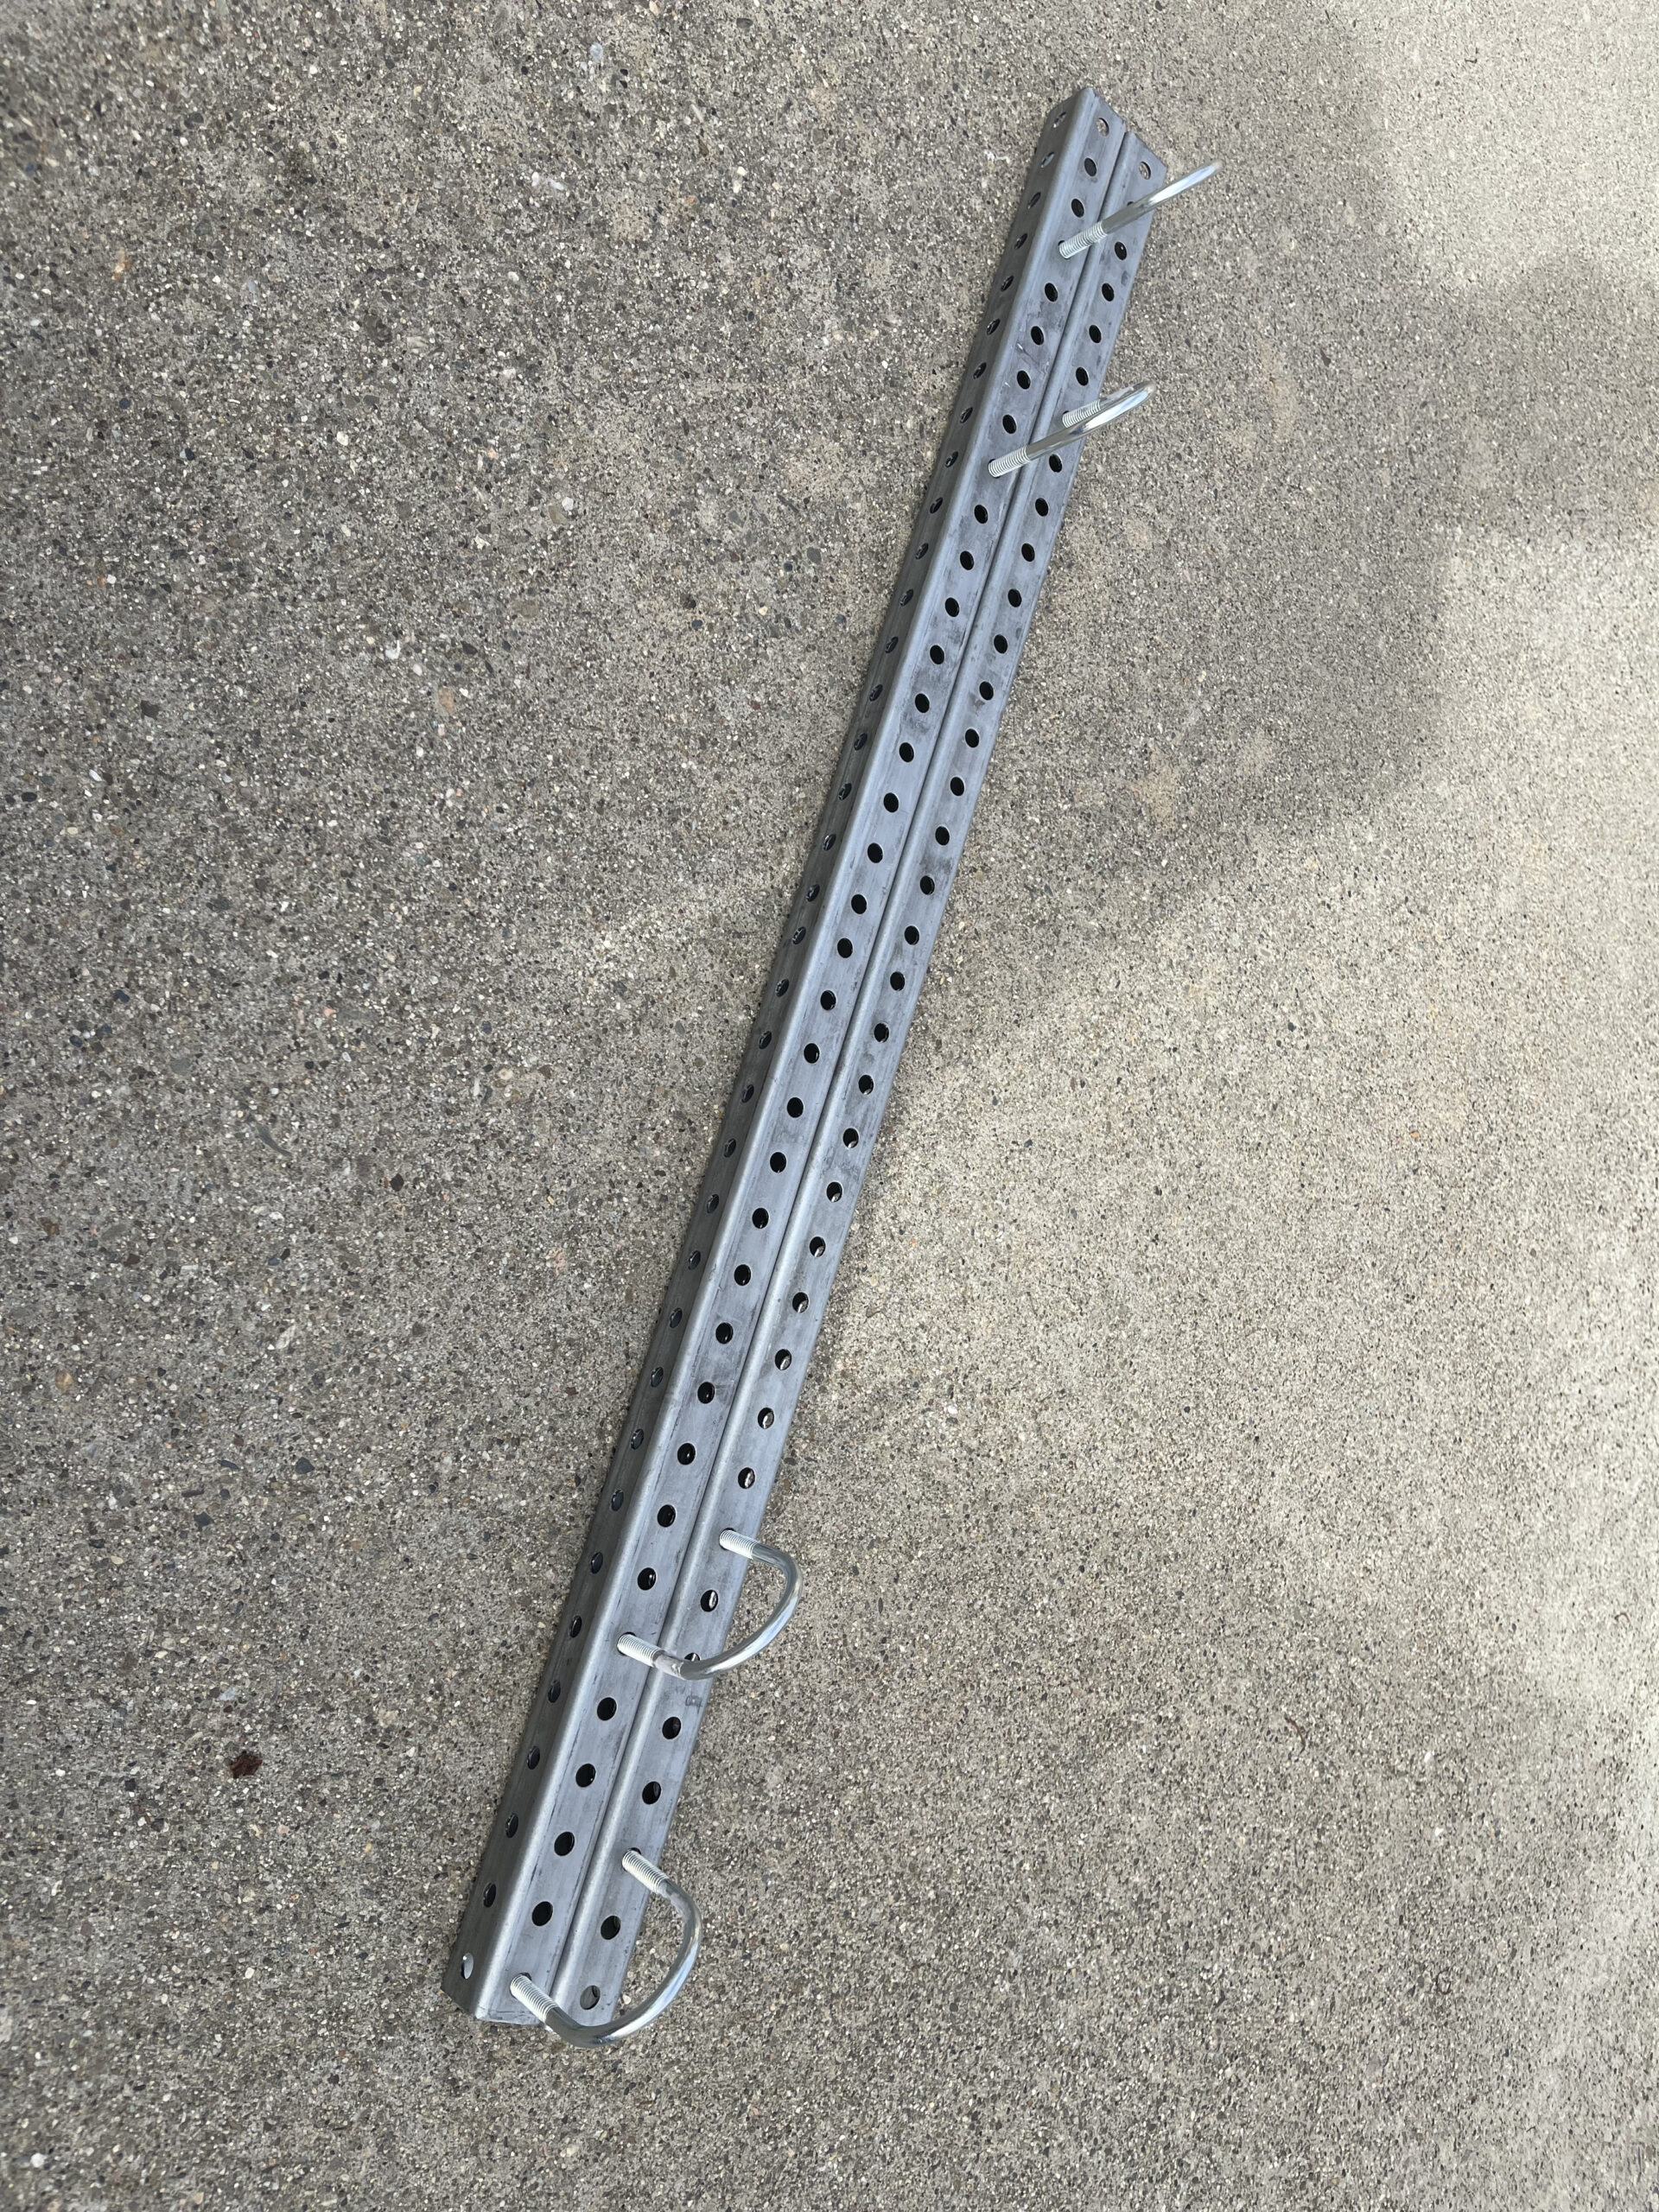
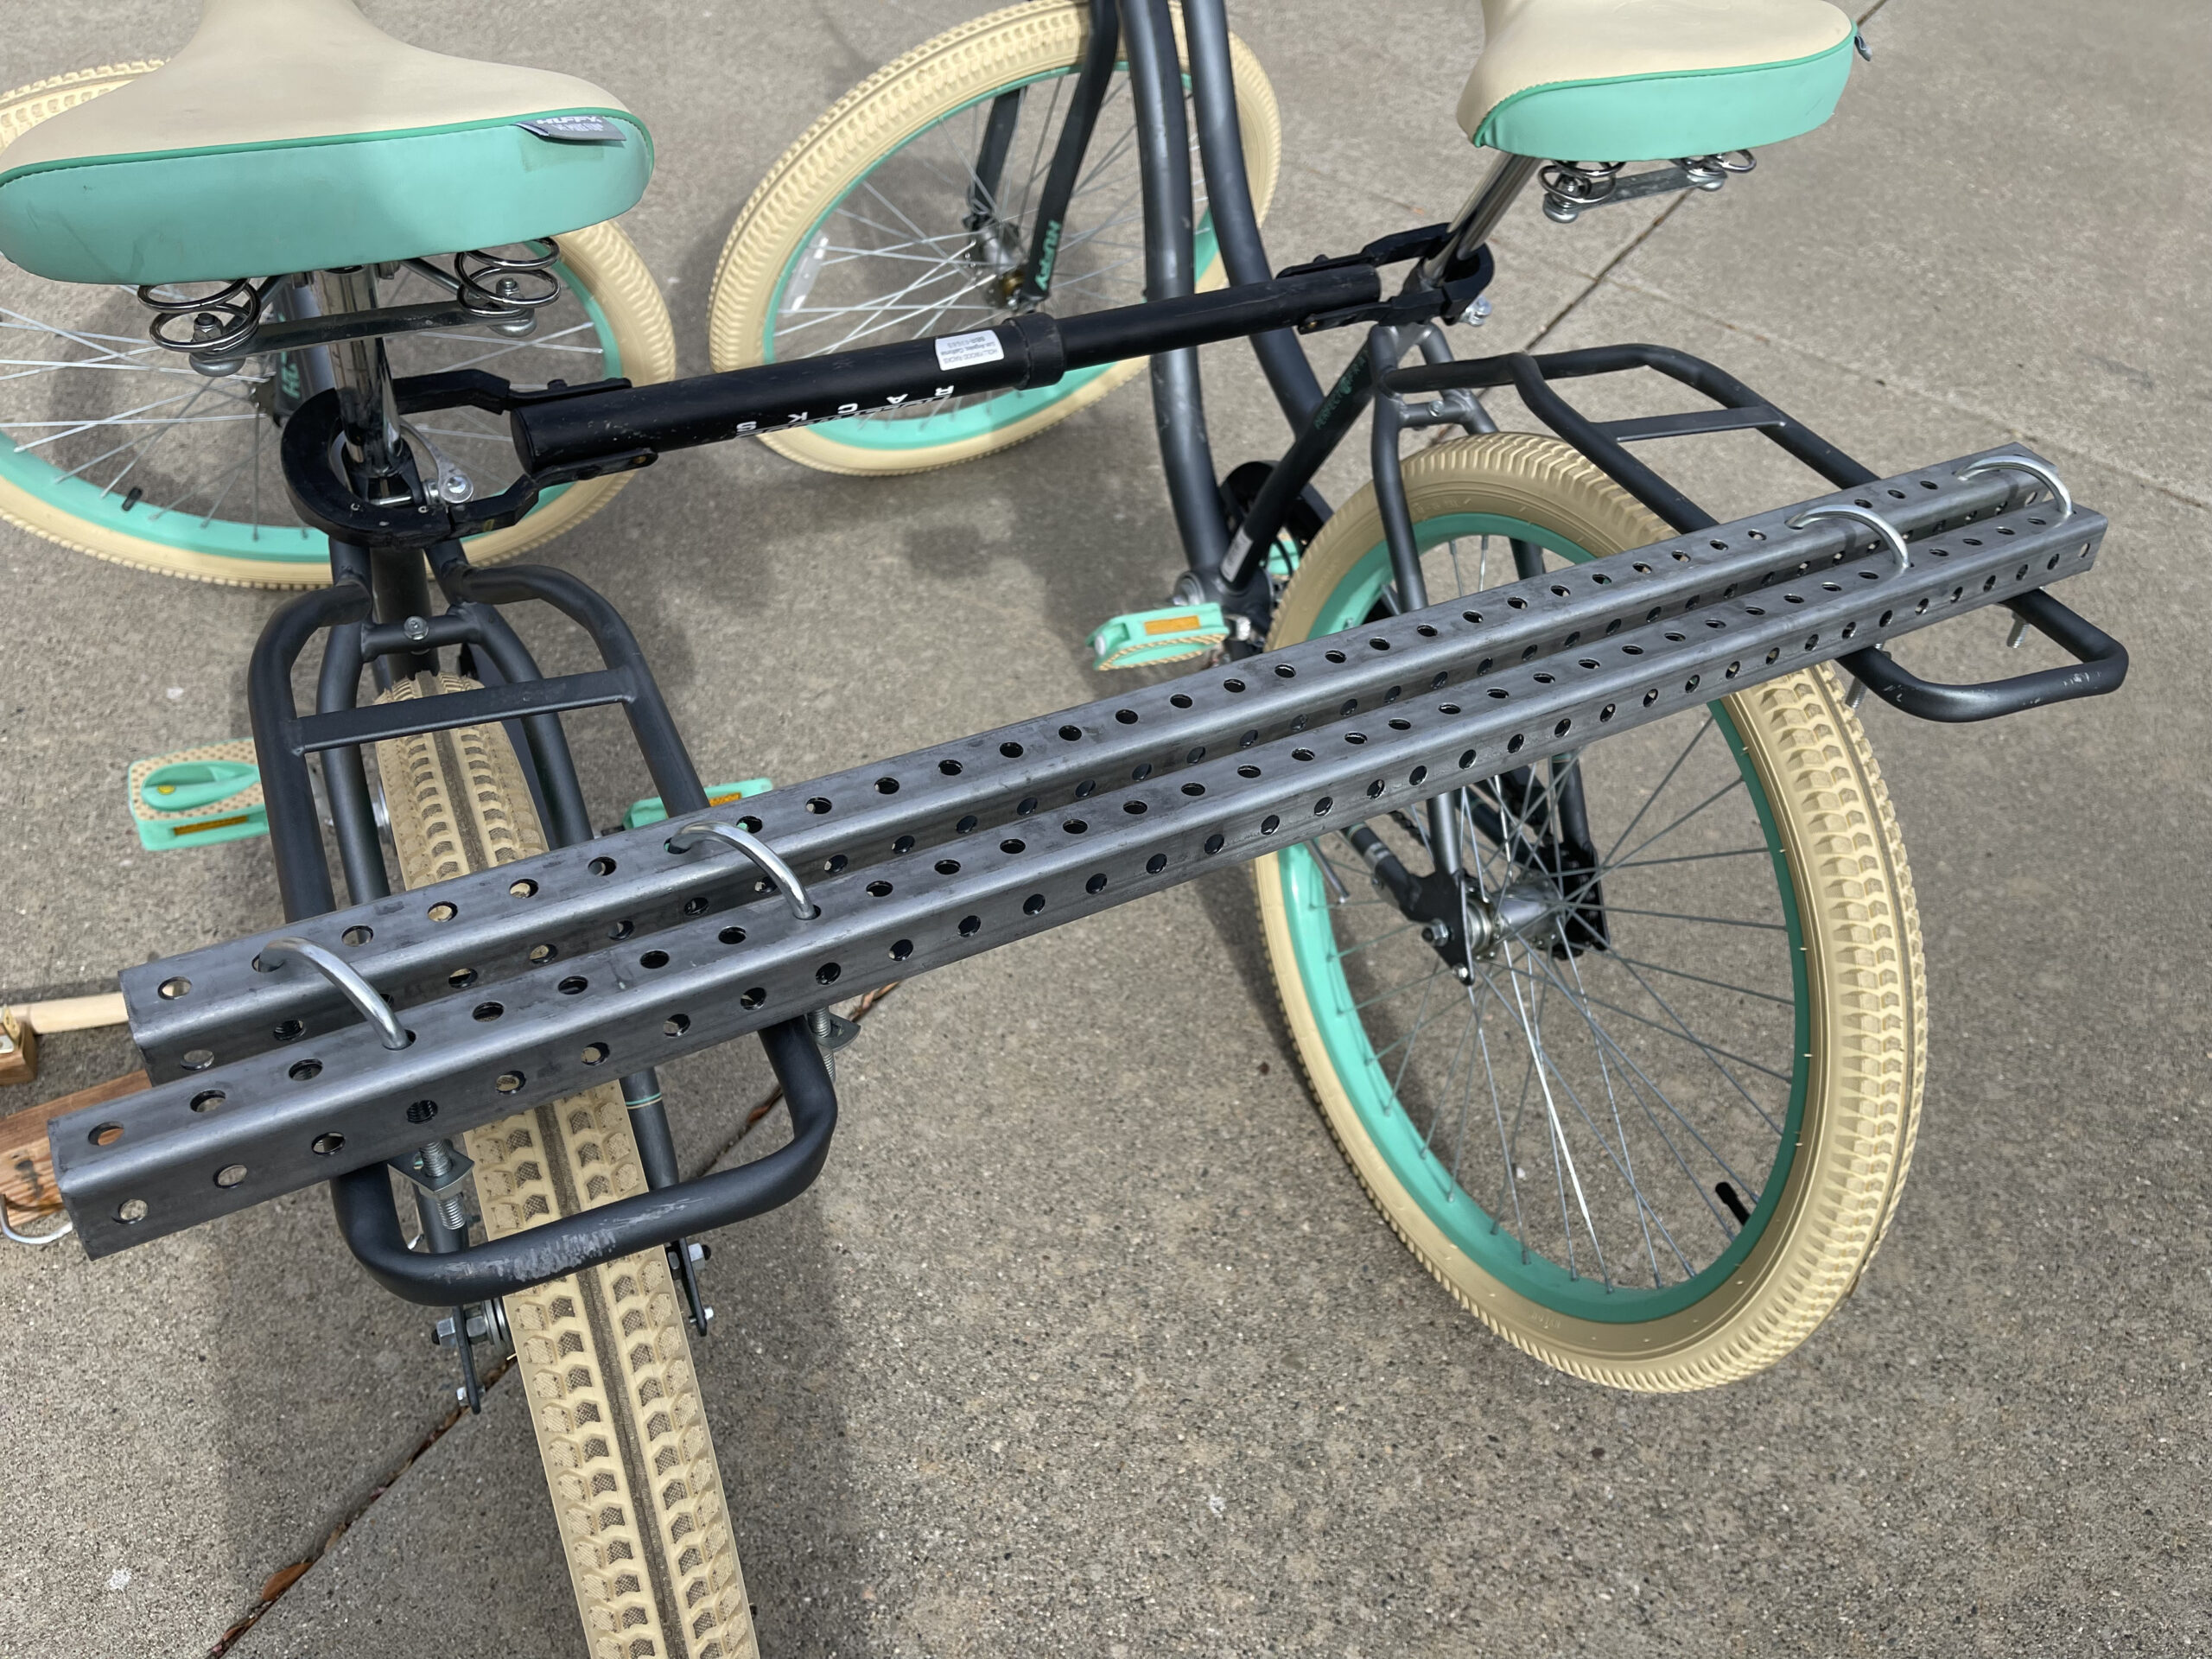
Instead, get a couple of 36″ square tubes at your local big box or local hardware store, and get four U-bolts. Put the square tubes next to each other and run the U-bolts through them like so.
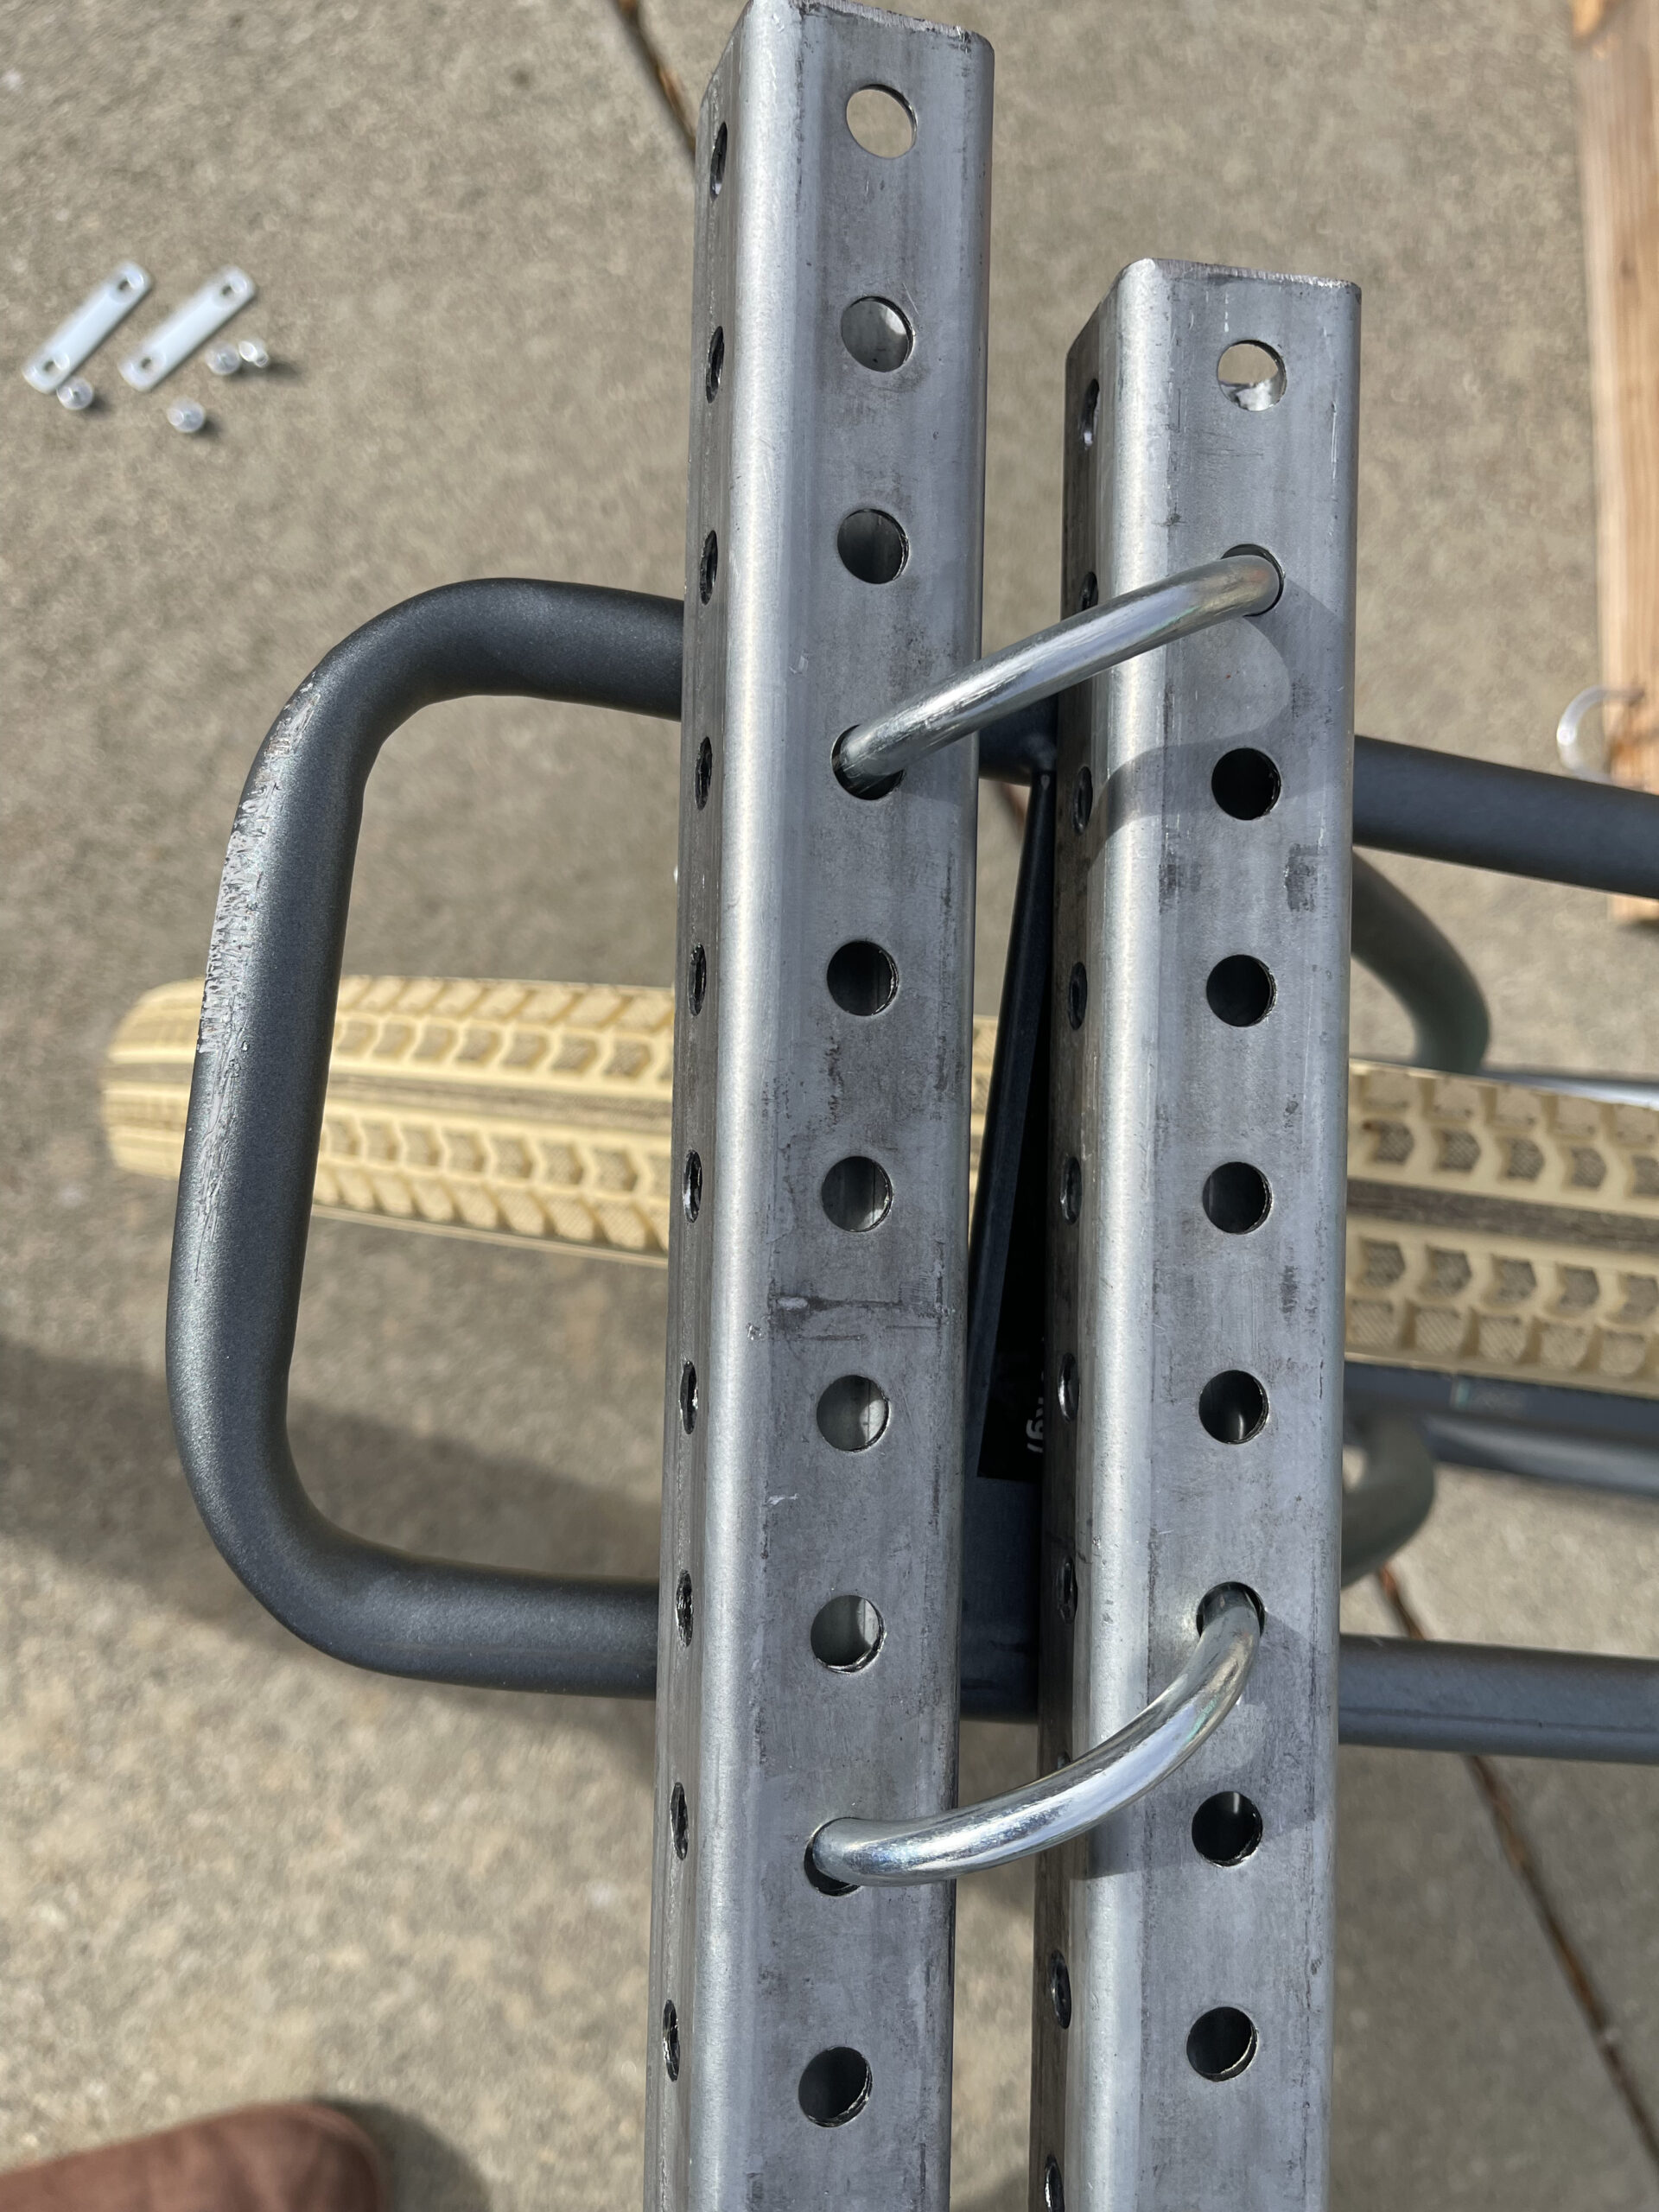
Here’s where the importance of the sturdy, pre-welded back rack comes into play on the bikes. Lay the square tubes across the back racks, and position the U-bolts on an angle straddling the places where the rack is welded. Here’s what it looks like from the top.
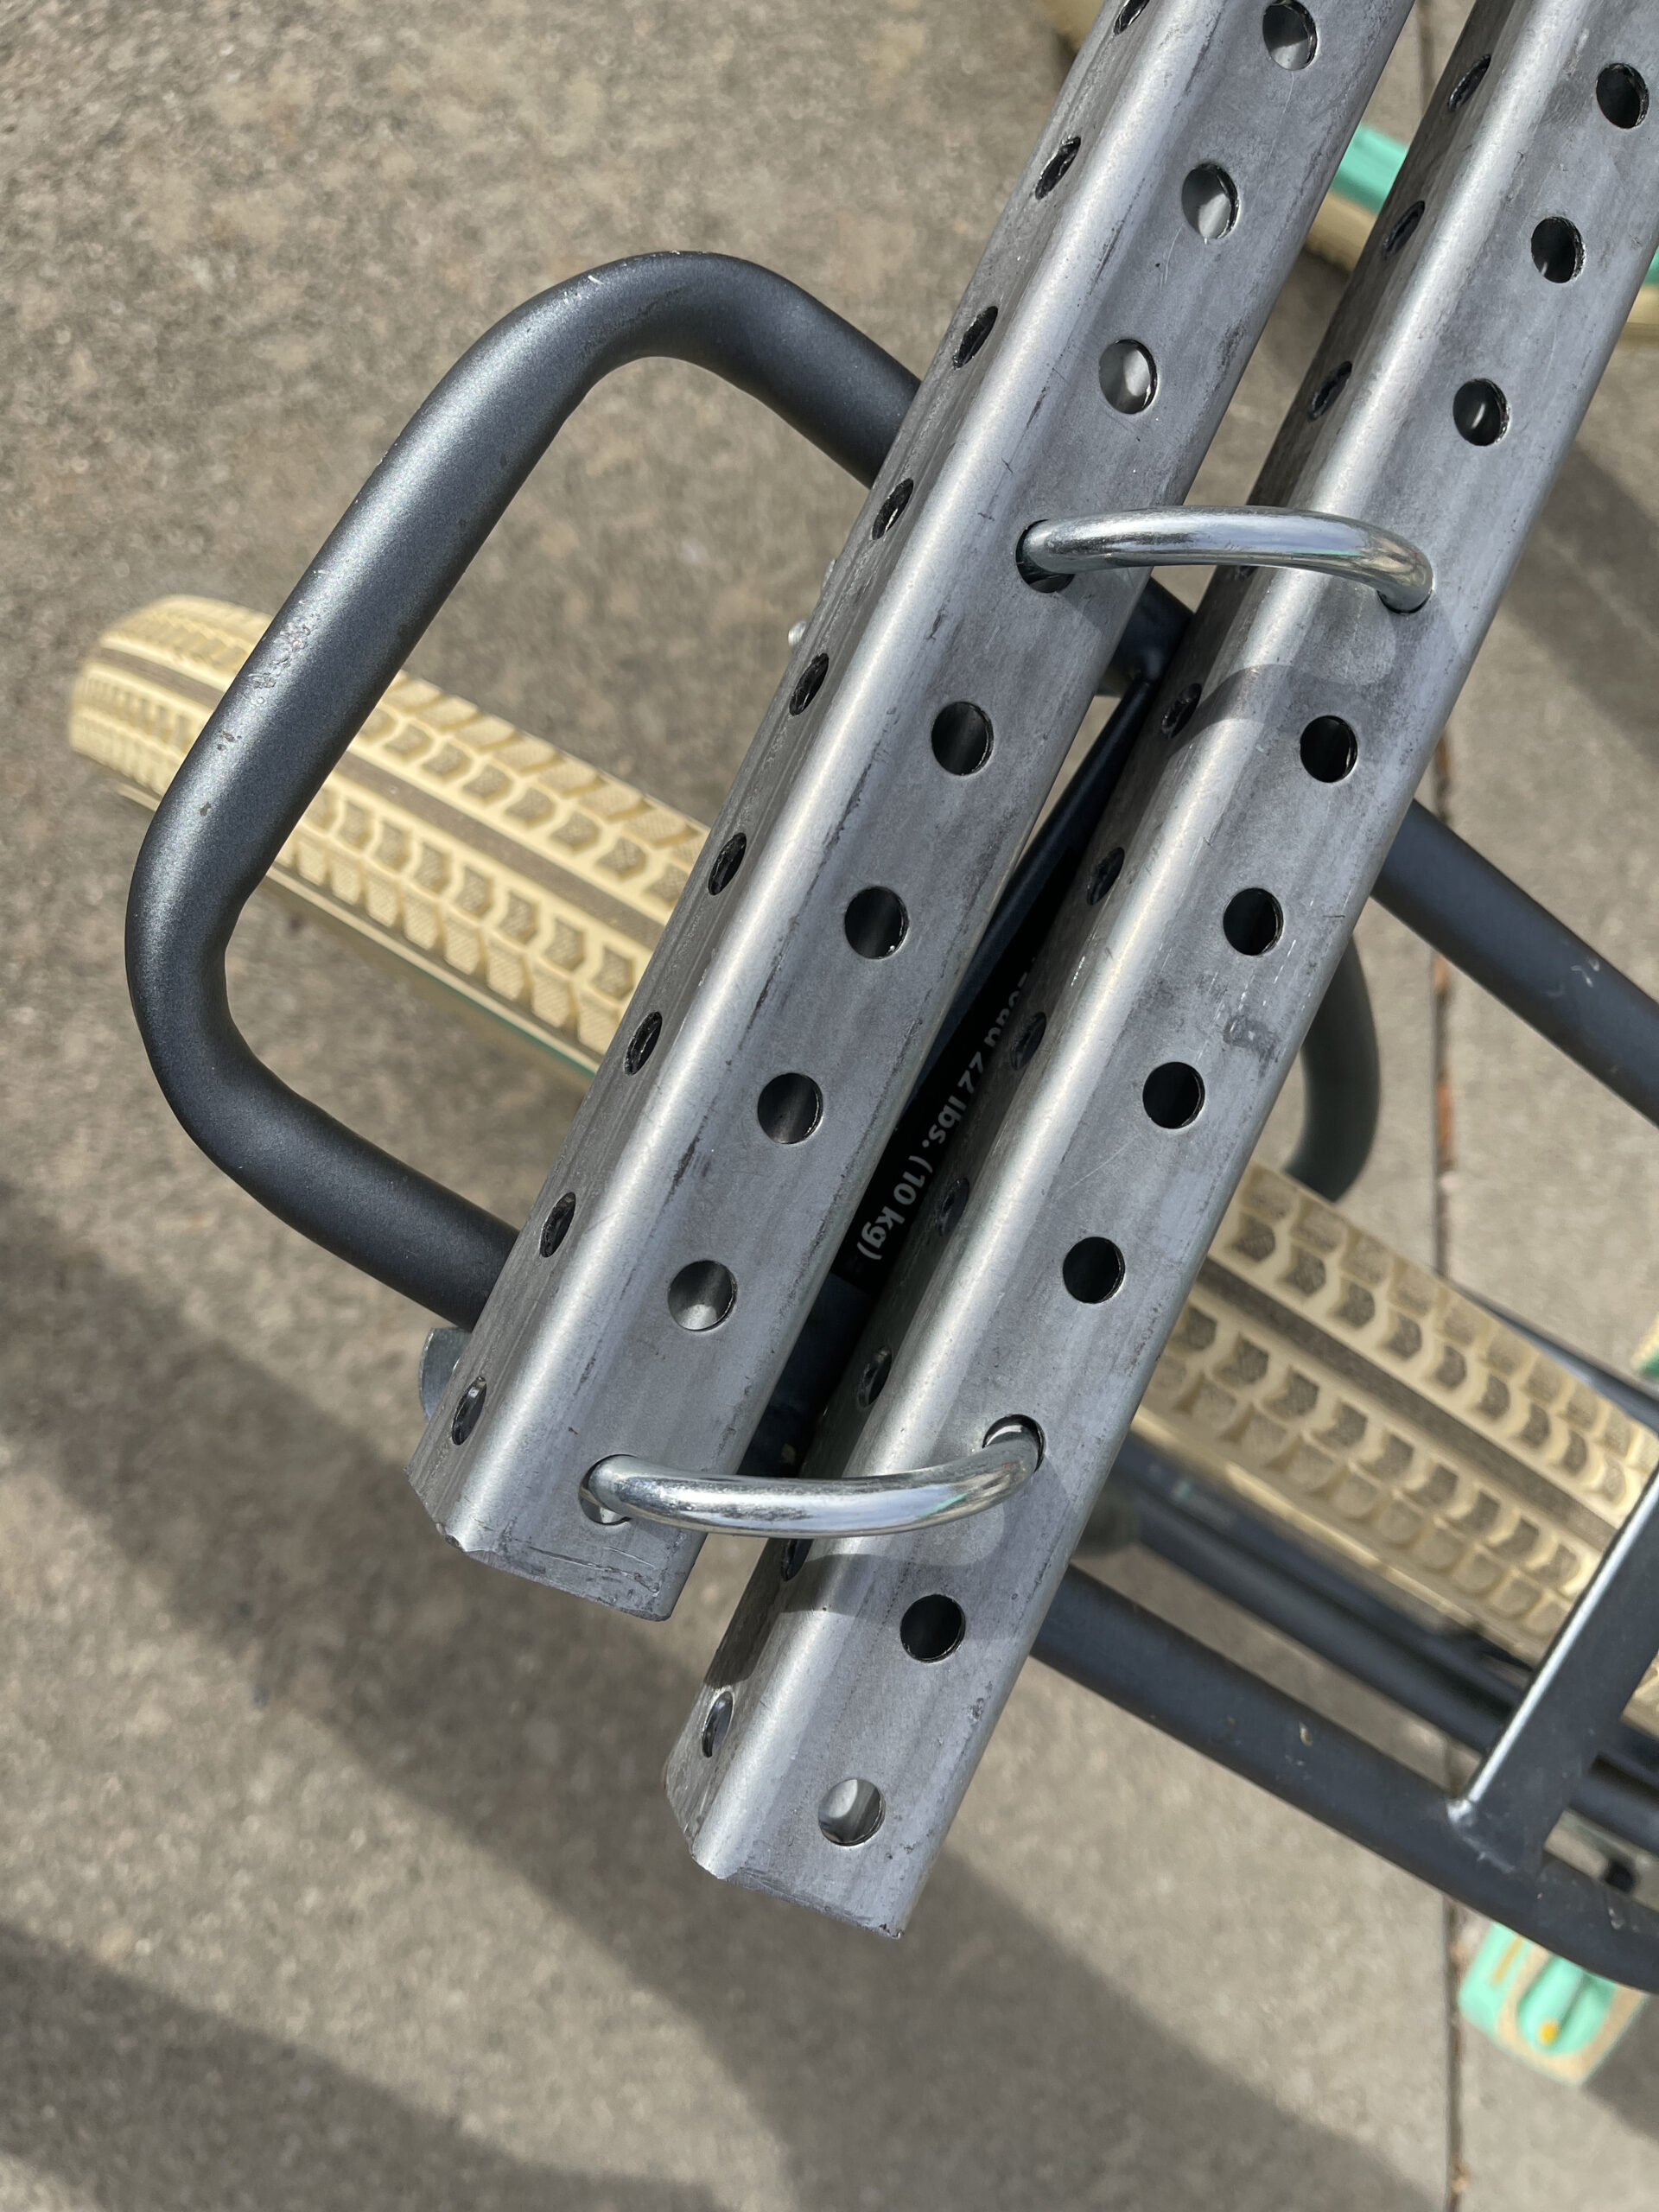
You’ll note that the square tubes may need to be offset by an inch or two in order to get them into position. This is ok.
On the bottom of the rack, slide the flat plates for the U-bolts on, and then put the nuts on the end of the U-bolts. You won’t need to tighten everything up yet, but make them snug and hand-tight.
Okay! We’ve got the back sort of situated. Make sure the square tubes and U-bolts are on the rack in such a way that they can’t slide from side to side, and that they can’t slide forward or backward.
Bracing the front of the sociable tandem
Just like we did across the back of the tandem with the square tubes, we need something to brace the front of the bike. A simple 2×4 works well here. To do this:
- Stand the bikes up straight and parallel with each other and make sure that they both are as close to perfectly vertical as possible AND make sure the distance between the bikes at the rear is the same as the distance between the bikes as the front. You’re looking to make sure that the bike frames are perfectly parallel to each other.
- Once you’ve got the frames situated, measure the distance with a tape measure between the front forks and write that down. Cut the 2×4 to be about 8″ wider than the distance between the fork front tubes.
- Mark where the forks are on the 2×4 with a pen.
- Mark where you’d want the small holes for the U-bolts to go. The U-bolts will loop around the front fork and secure to the 2×4.
- In the image below, there are two large holes outside of the U-bolts. You do NOT need these holes. We use them when we attach a canopy to the tandem, but those large holes are NOT needed structurally.
- The only holes you need to drill are the four small holes (two on each side) for the U-bolts to slide through. Drill those four small holes.

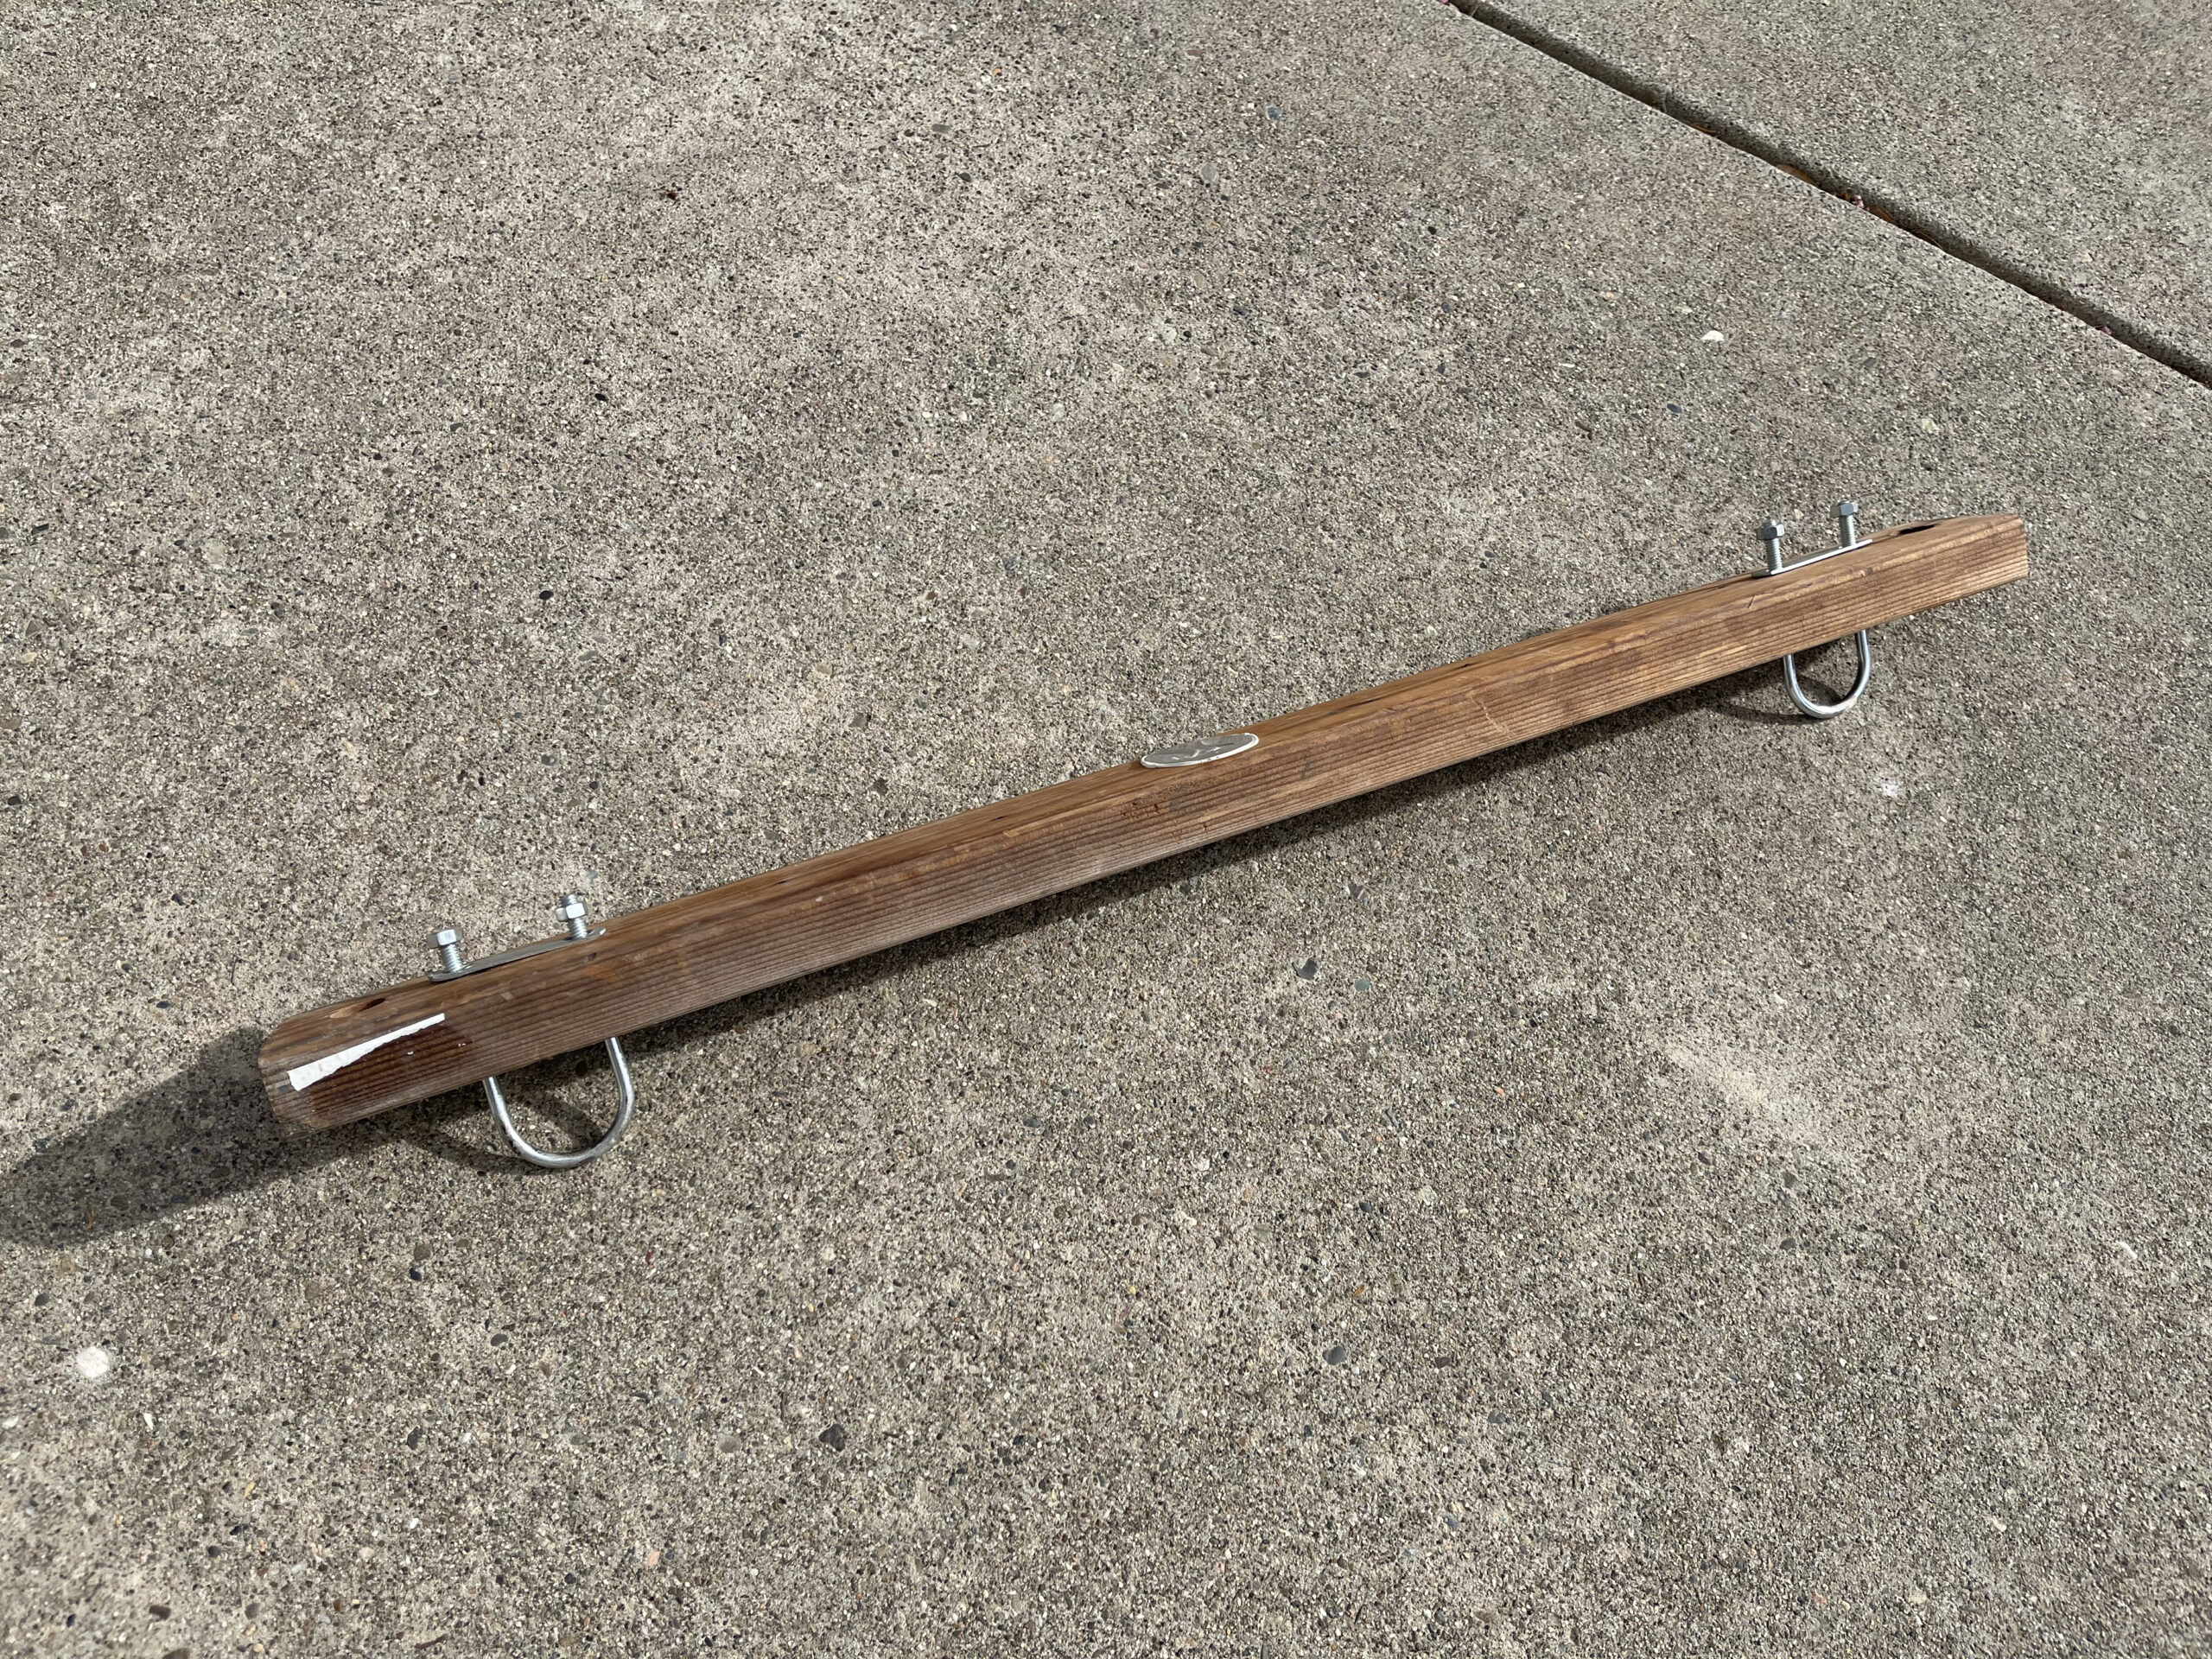
Here’s what the 2×4 looks like from the front with the U-bolts in it.
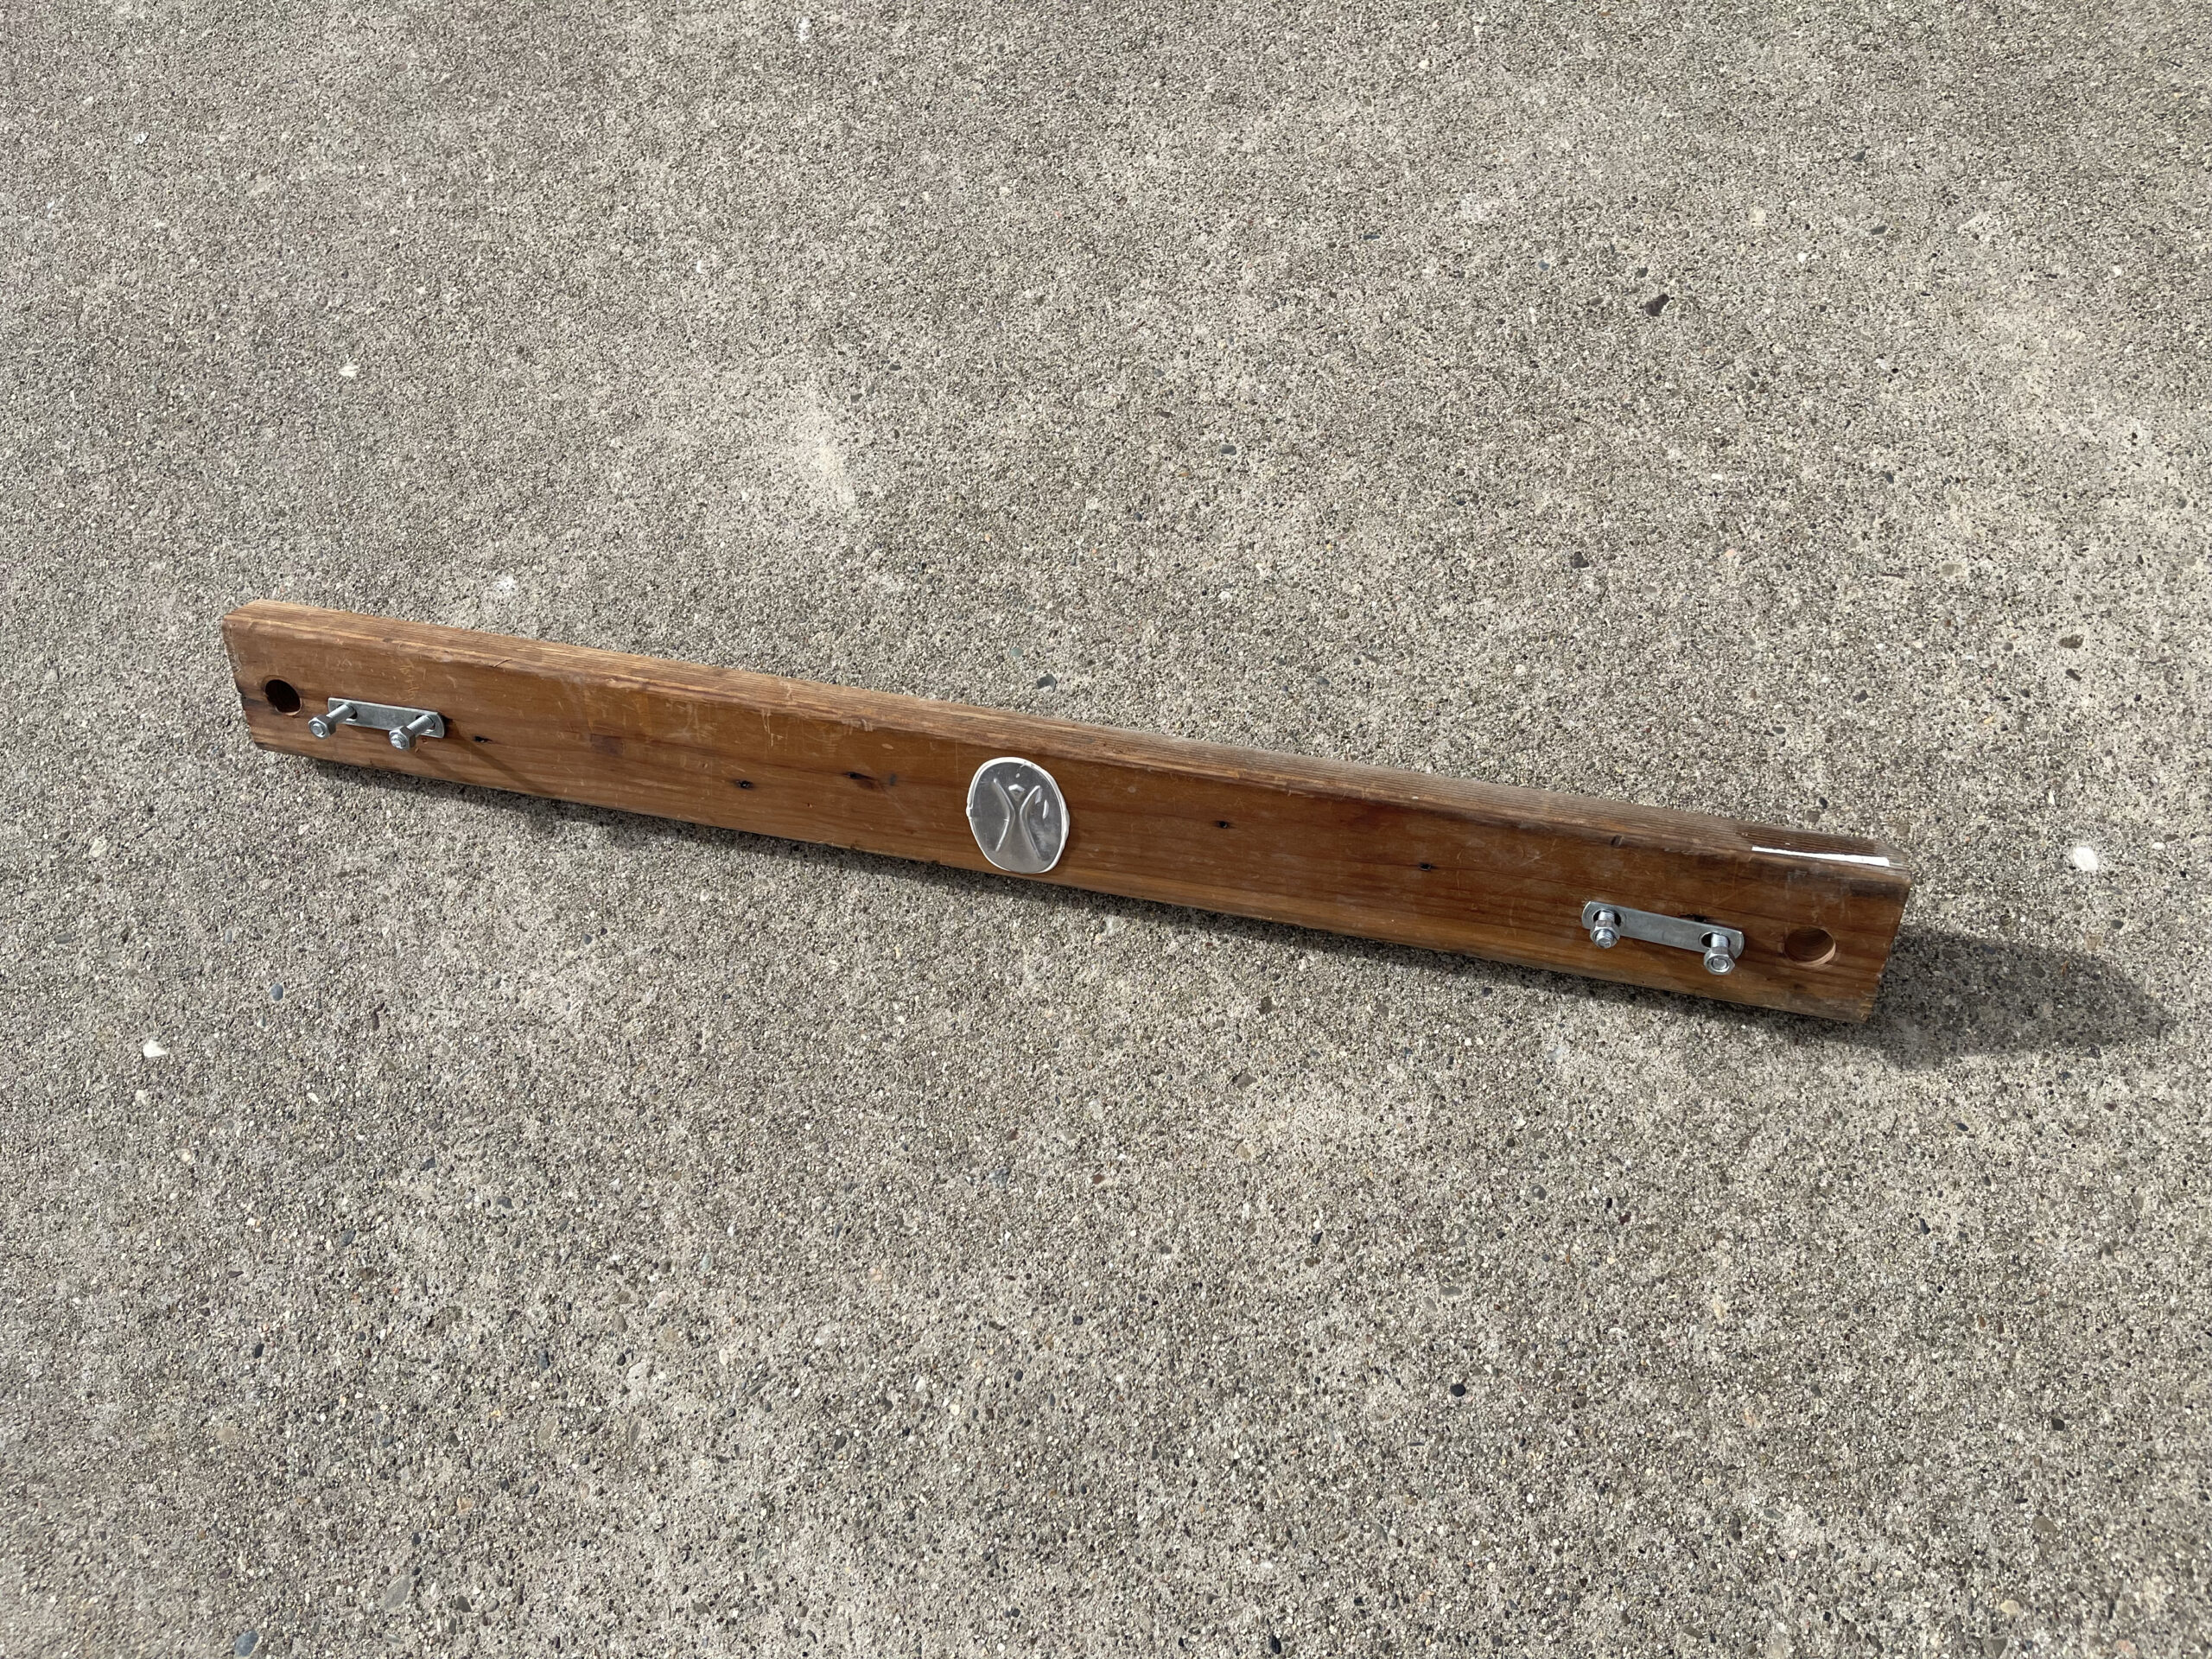
And here’s what it looks like from the top and back.
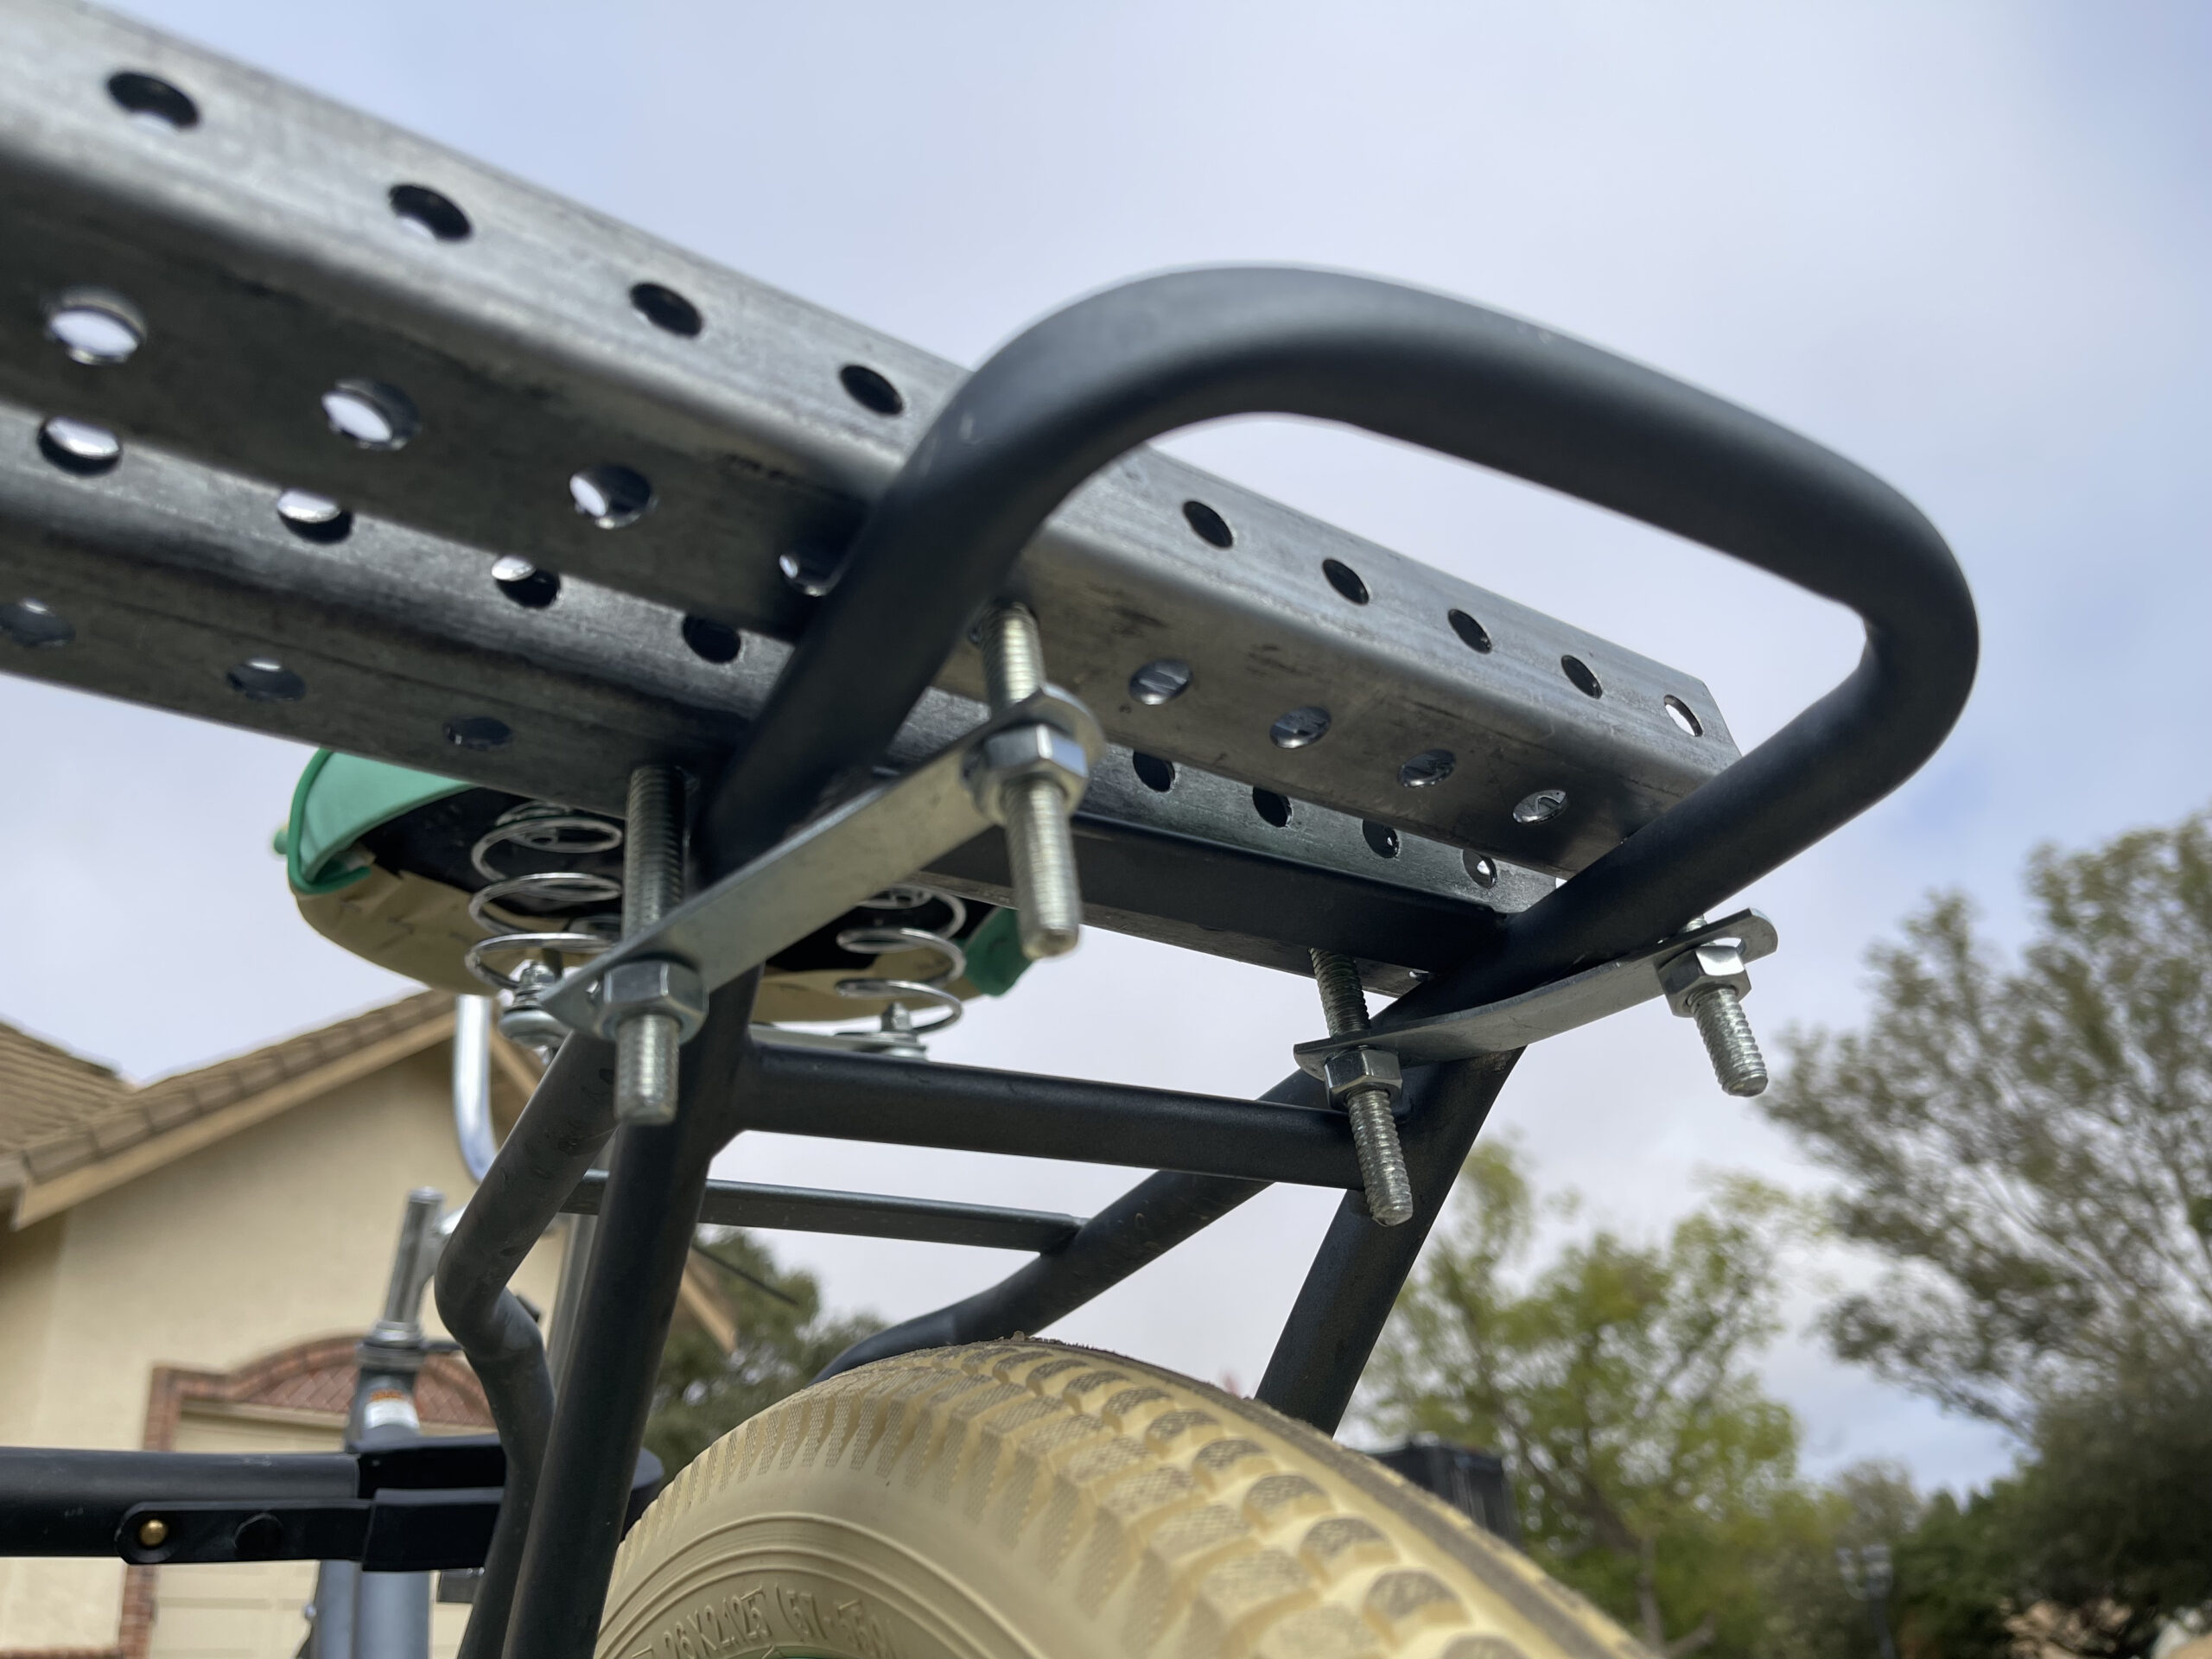
Here’s what it looks like when it’s installed. Again, make things hand-tight on the U-bolts, but you don’t need to crank them down all the way yet.
Let’s put some support at the lower rear of the tandem
At this point, you are probably getting UNREASONABLY EXCITED (or, reasonably excited, actually — this is pretty cool). It looks like a tandem and you can see it starting to come together!
When we built the prototype, there was one thing we noticed, which was the frames wanted to deflect toward each other and sort of try to collapse. To prevent this, you’ll want to add another support across the back of the bike.
In almost every frame, there are two little holes pre-drilled next to the rear hubs for attaching things like additional racks and such. We’re going to use these to our advantage.
With the bikes standing straight up and parallel, measure the distance between the inside of the rear frames at these connection points noted in the point above.
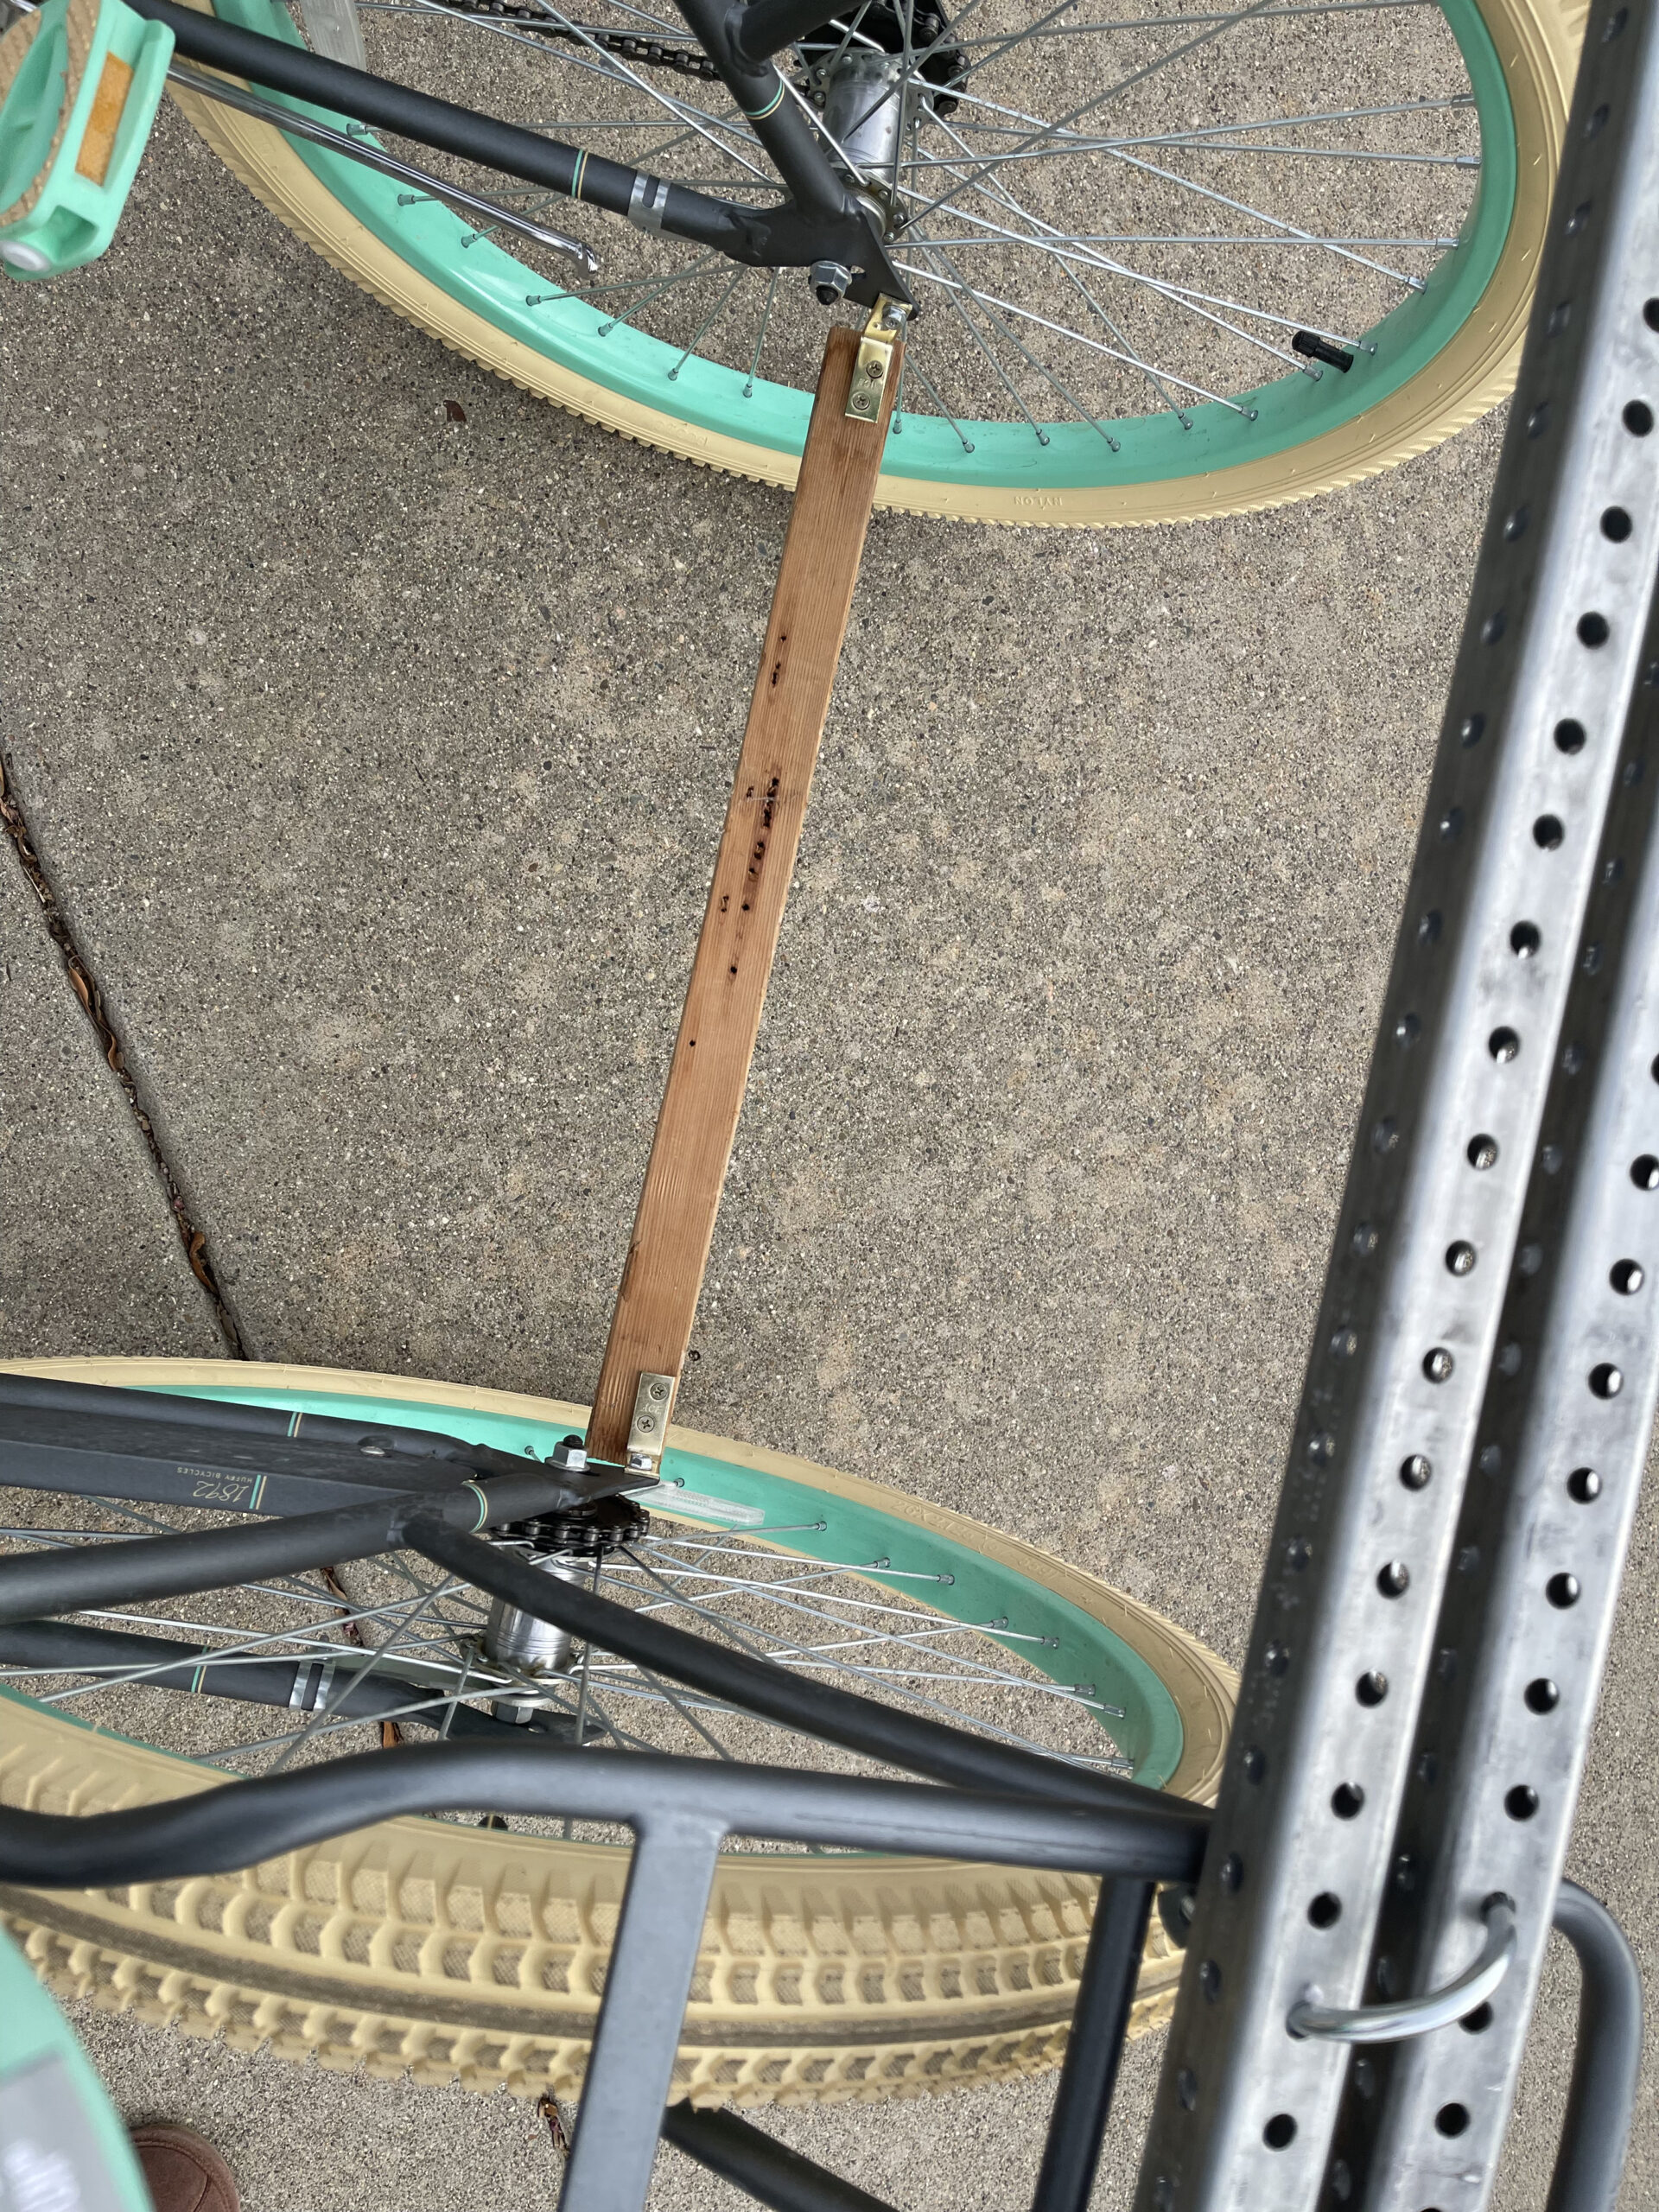
Cut the 2×2 to that length and attach the angle brackets to the 2×2 like so.

Affix the 2×2 across the bottom rear of the frame to those connection points. This will provide a noticeable amount of stability and rigidity to the tandem and help prevent it from folding in on itself.
At this point, the sociable tandem is totally rideable! If you’re going to do that with a partner, make sure you are really sociable and communicating well as you ride! Nothing worse than one person turning left when the other turns right as you approach an obstacle. ? #safetythird
Time for some magic
When first researching sociable tandems a few years back, this was the component that did fully blow my mind. If you yoke the handlebars together, not only does it solve the one-turns-left and one-turns-right issue noted above, it even makes the tandem rideable by a single individual! When yoked together, the other handlebar happily follows along the same direction when the first handlebar is turned. Here’s how to do it.
What’s needed:
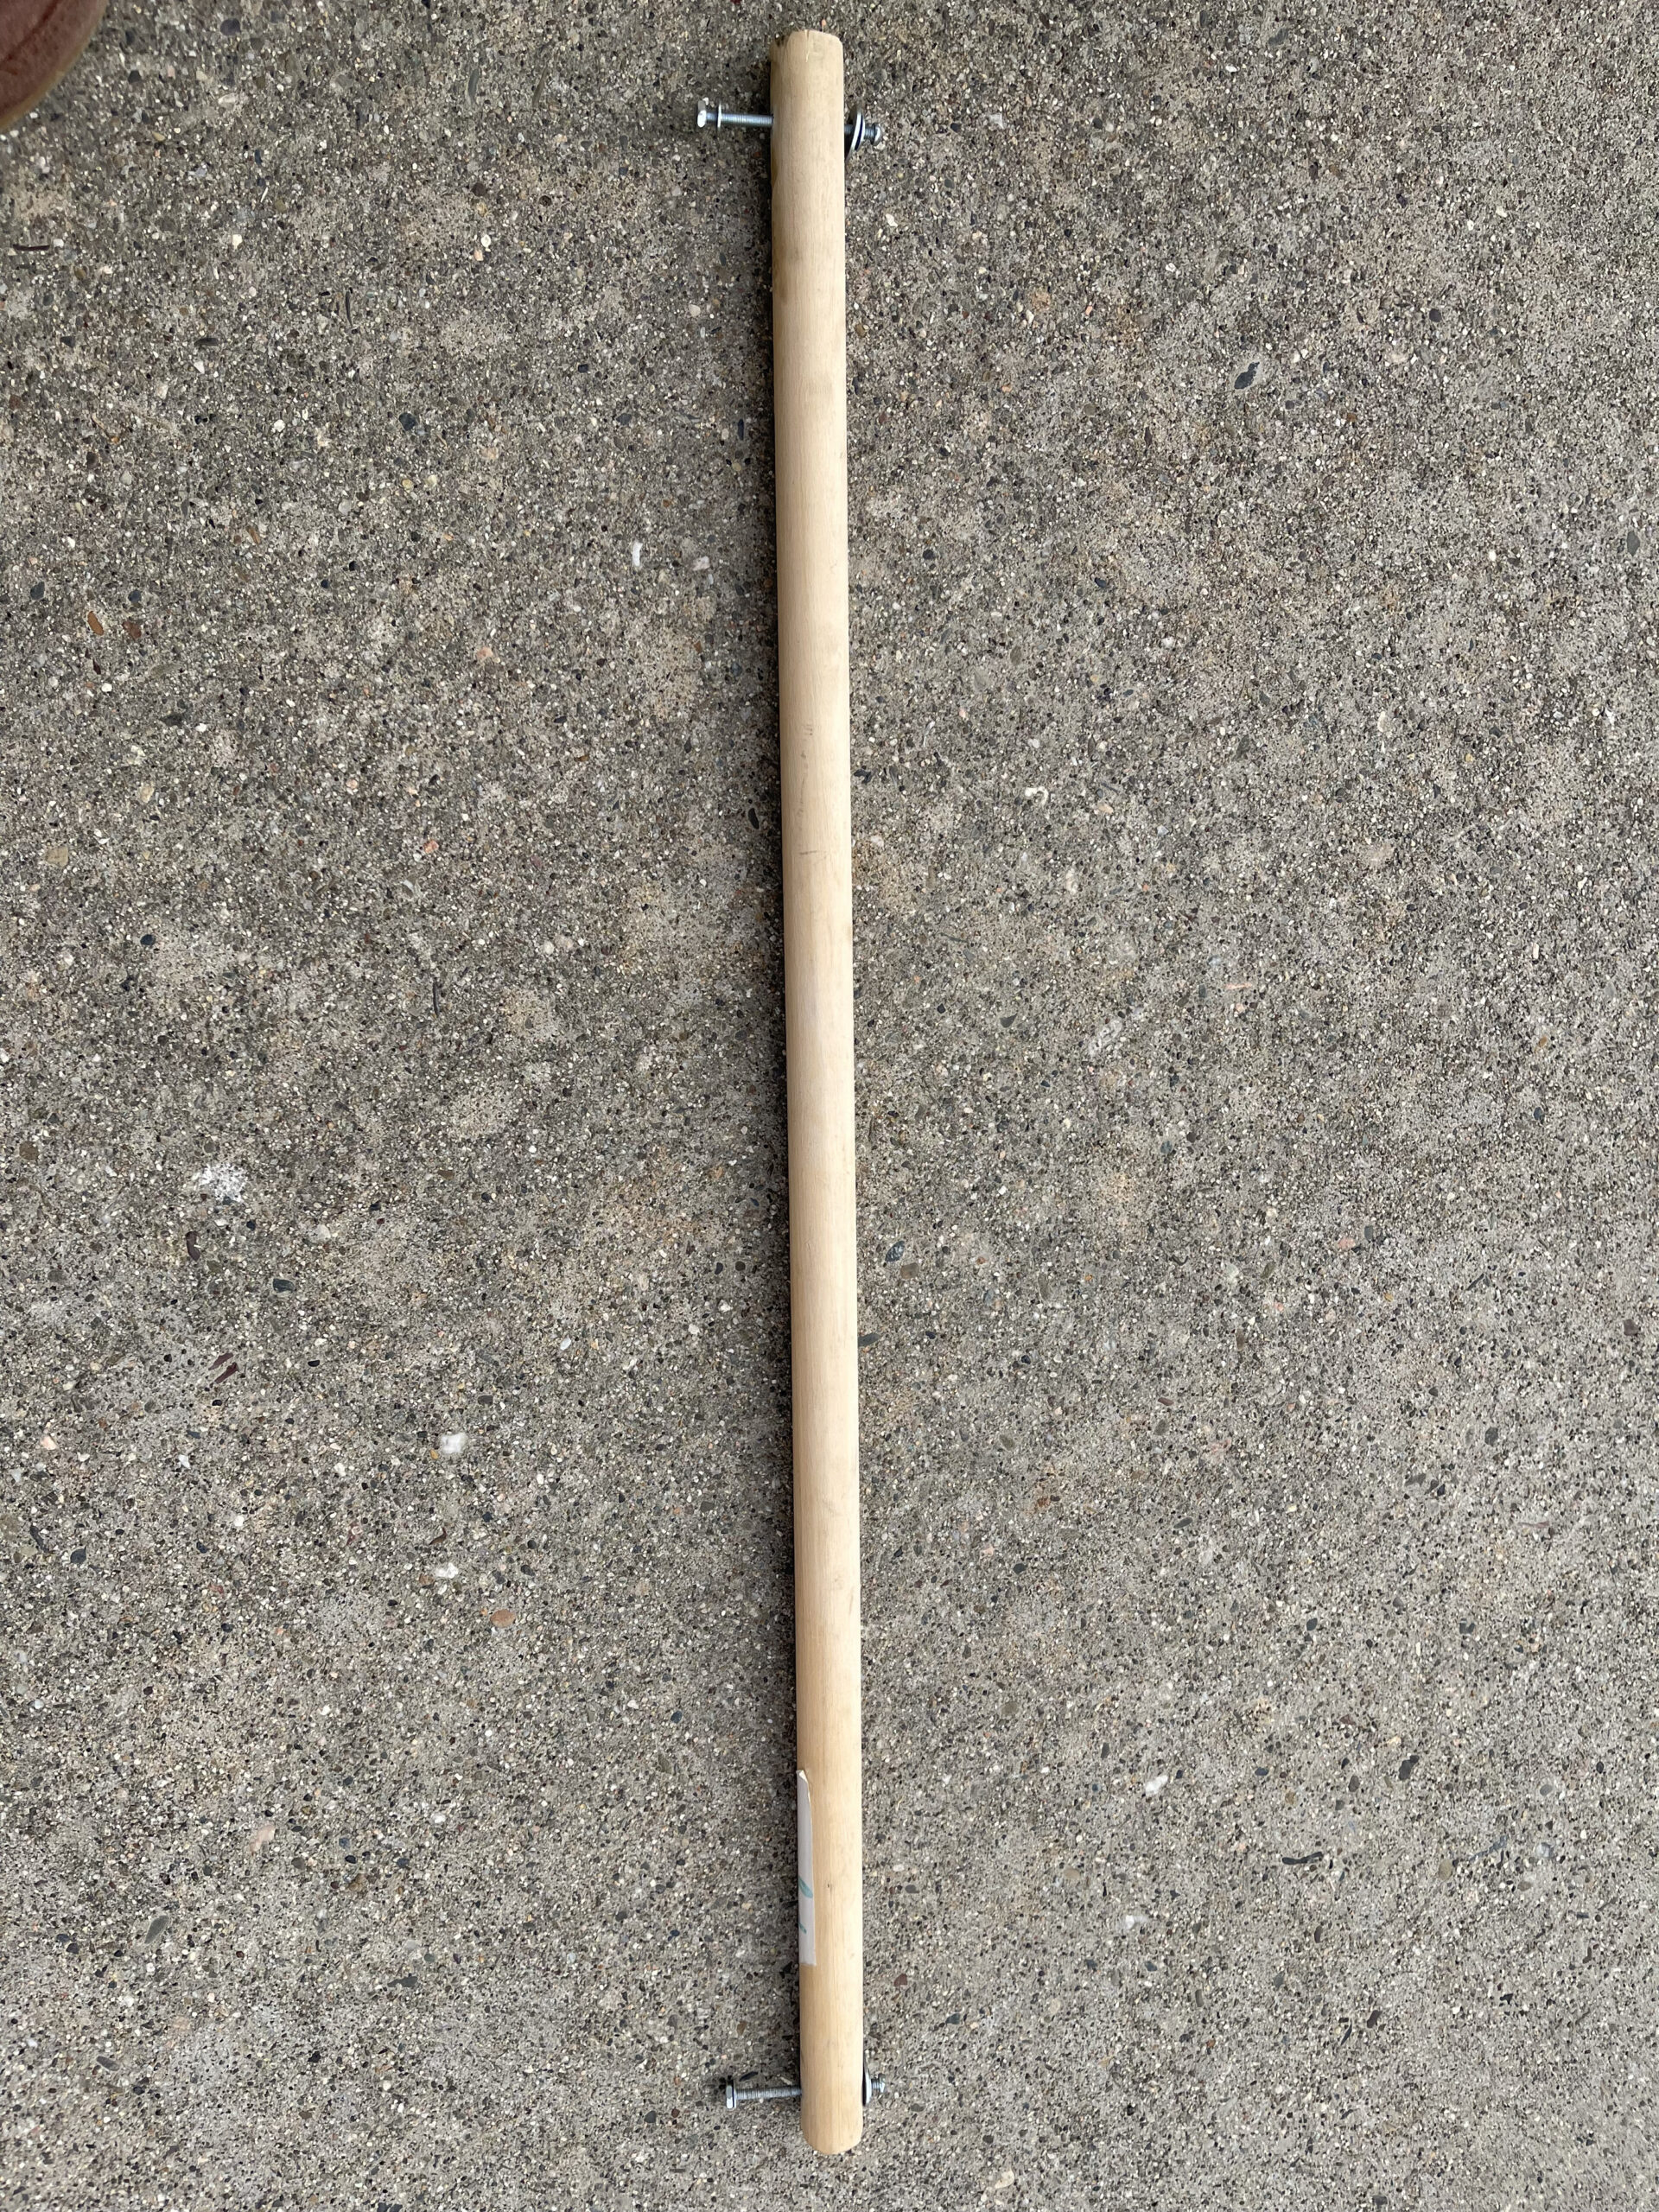
- A broomstick or similar dowel
- Two flat brackets
- A couple of bolts

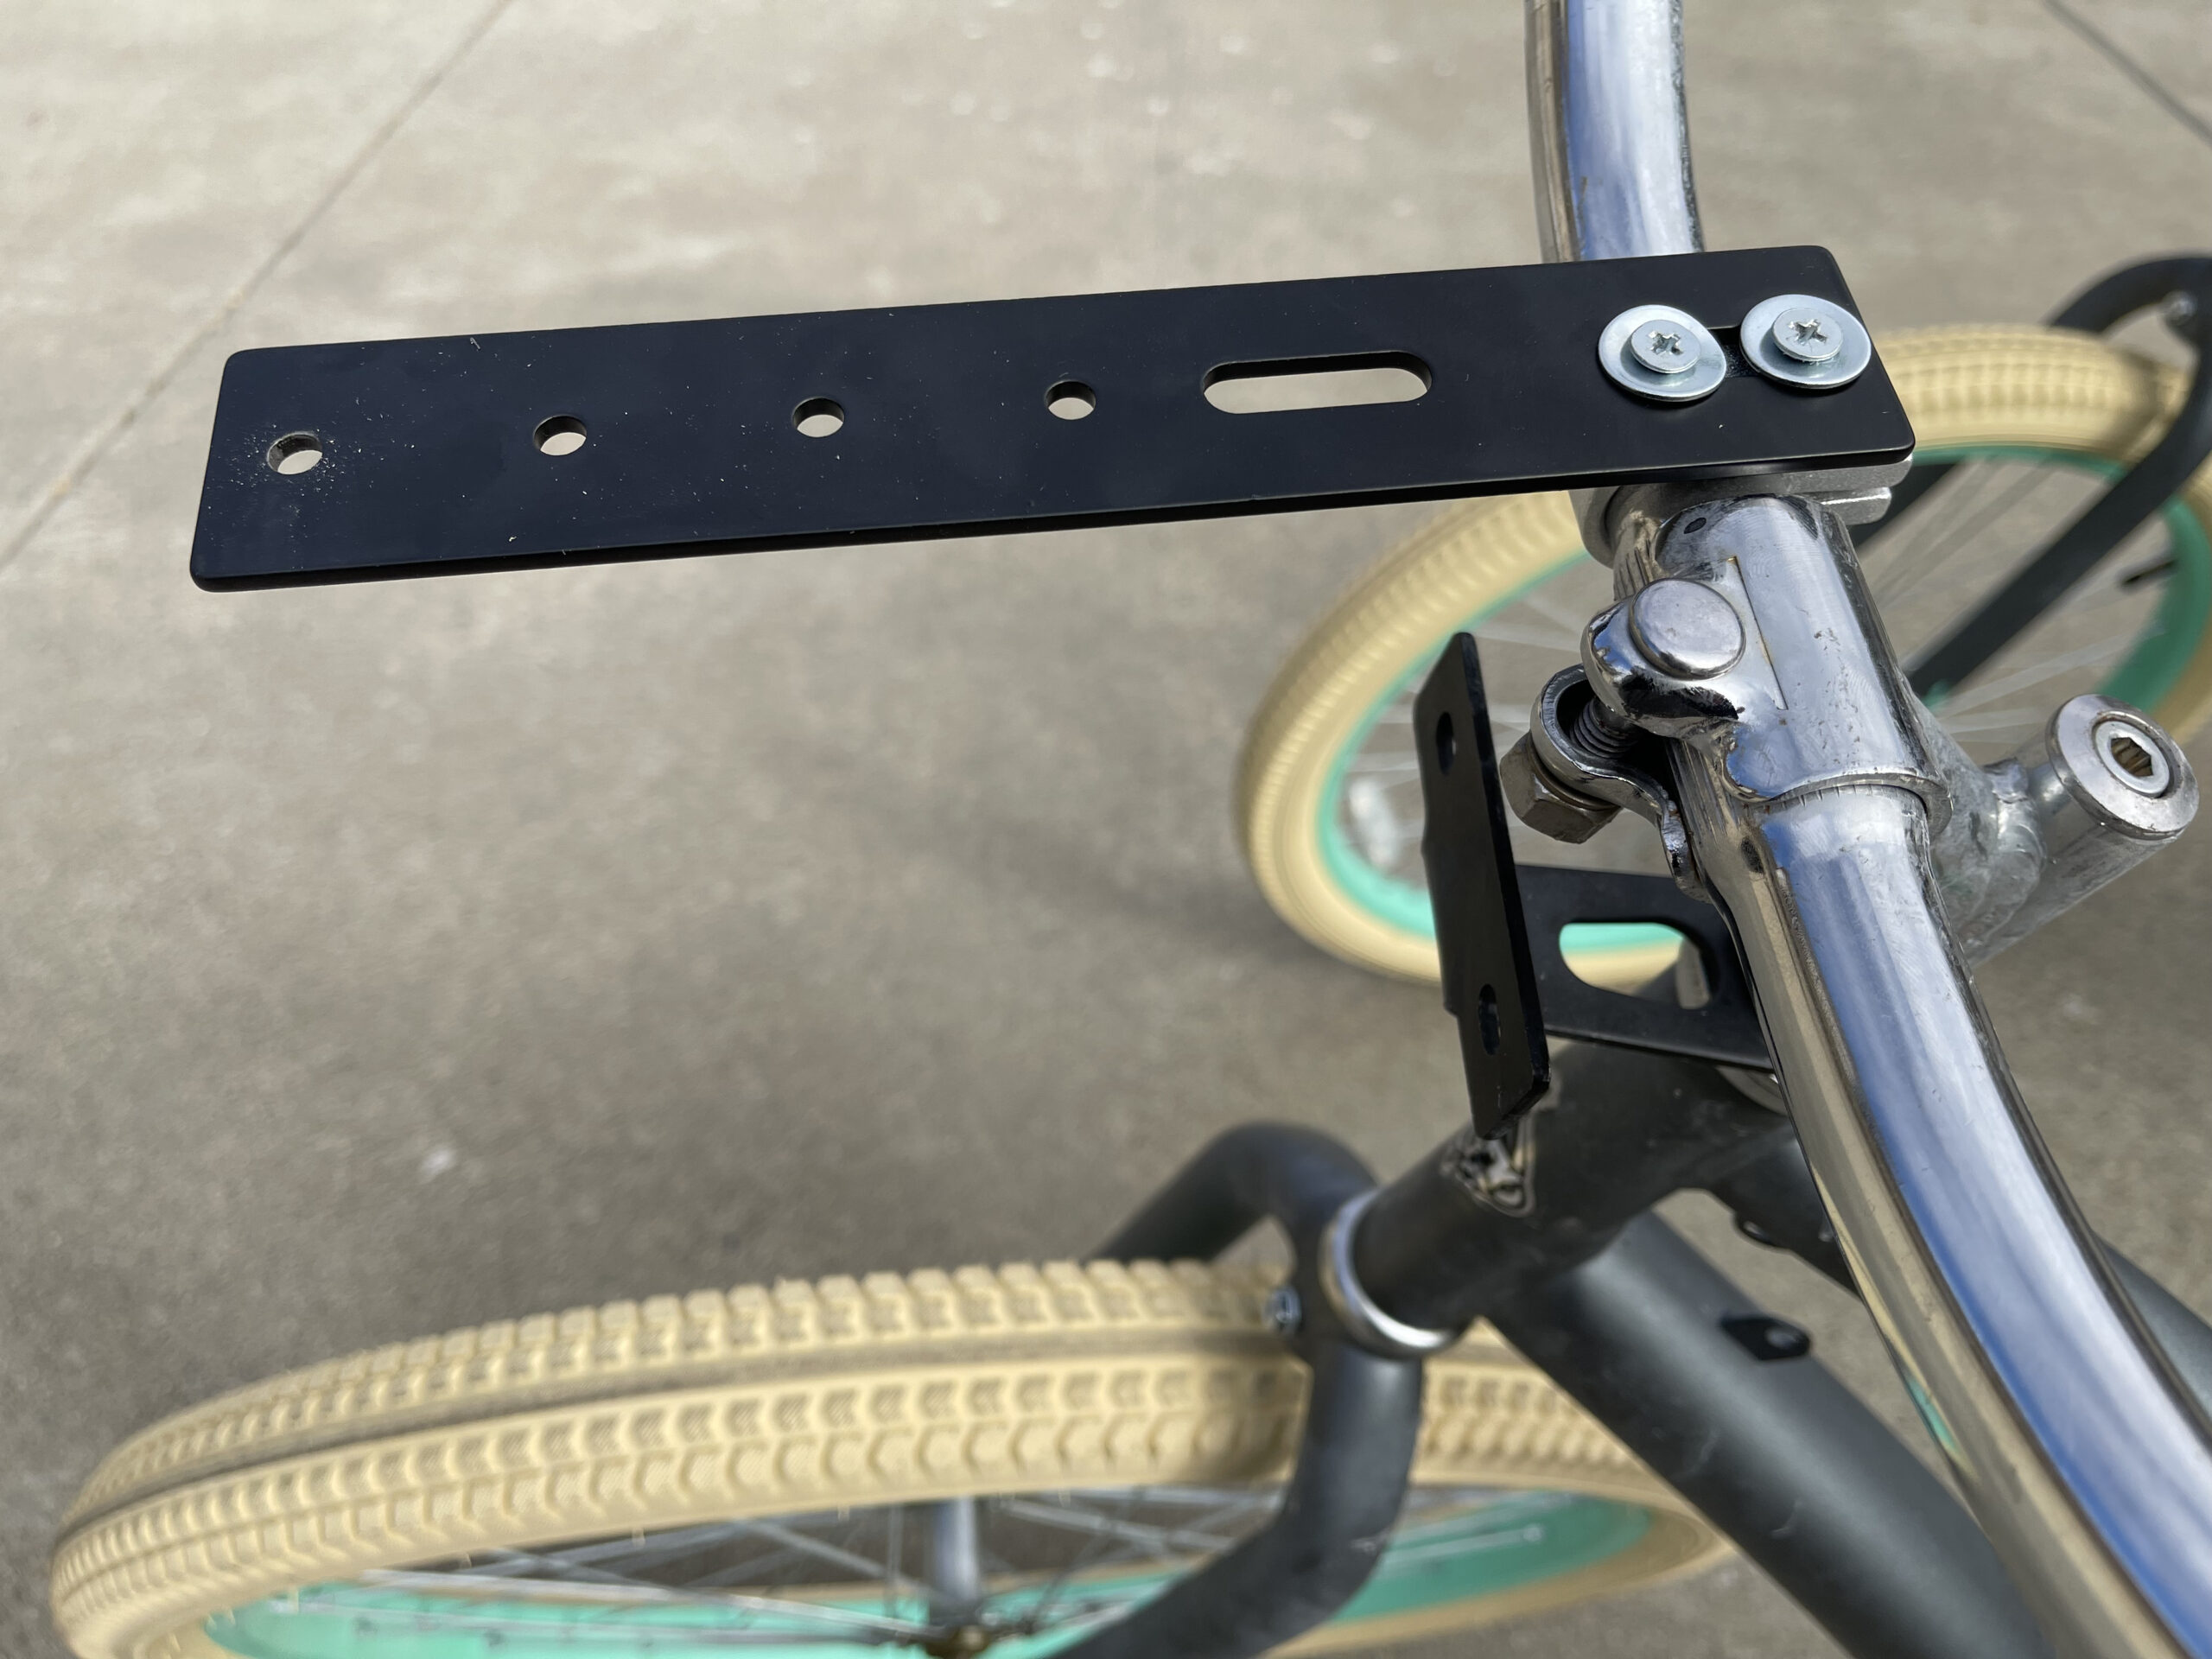
The flat brackets I found that worked are called “flat slotted mending plates.” I got these ones off of Amazon, but your local hardware store may have them as well. They are a couple of dollars each.
Another bonus of this particular bike was that it had pre-attached brackets on the handlebars for a cupholder(?-wtf). I took the cupholders off and left the brackets on, and attached the mending plates to the brackets.
Make sure the brackets are on the same side of the handlebars, and the same distance from the center. For our bike here, they were just about an inch to the right of center on each set of handlebars.

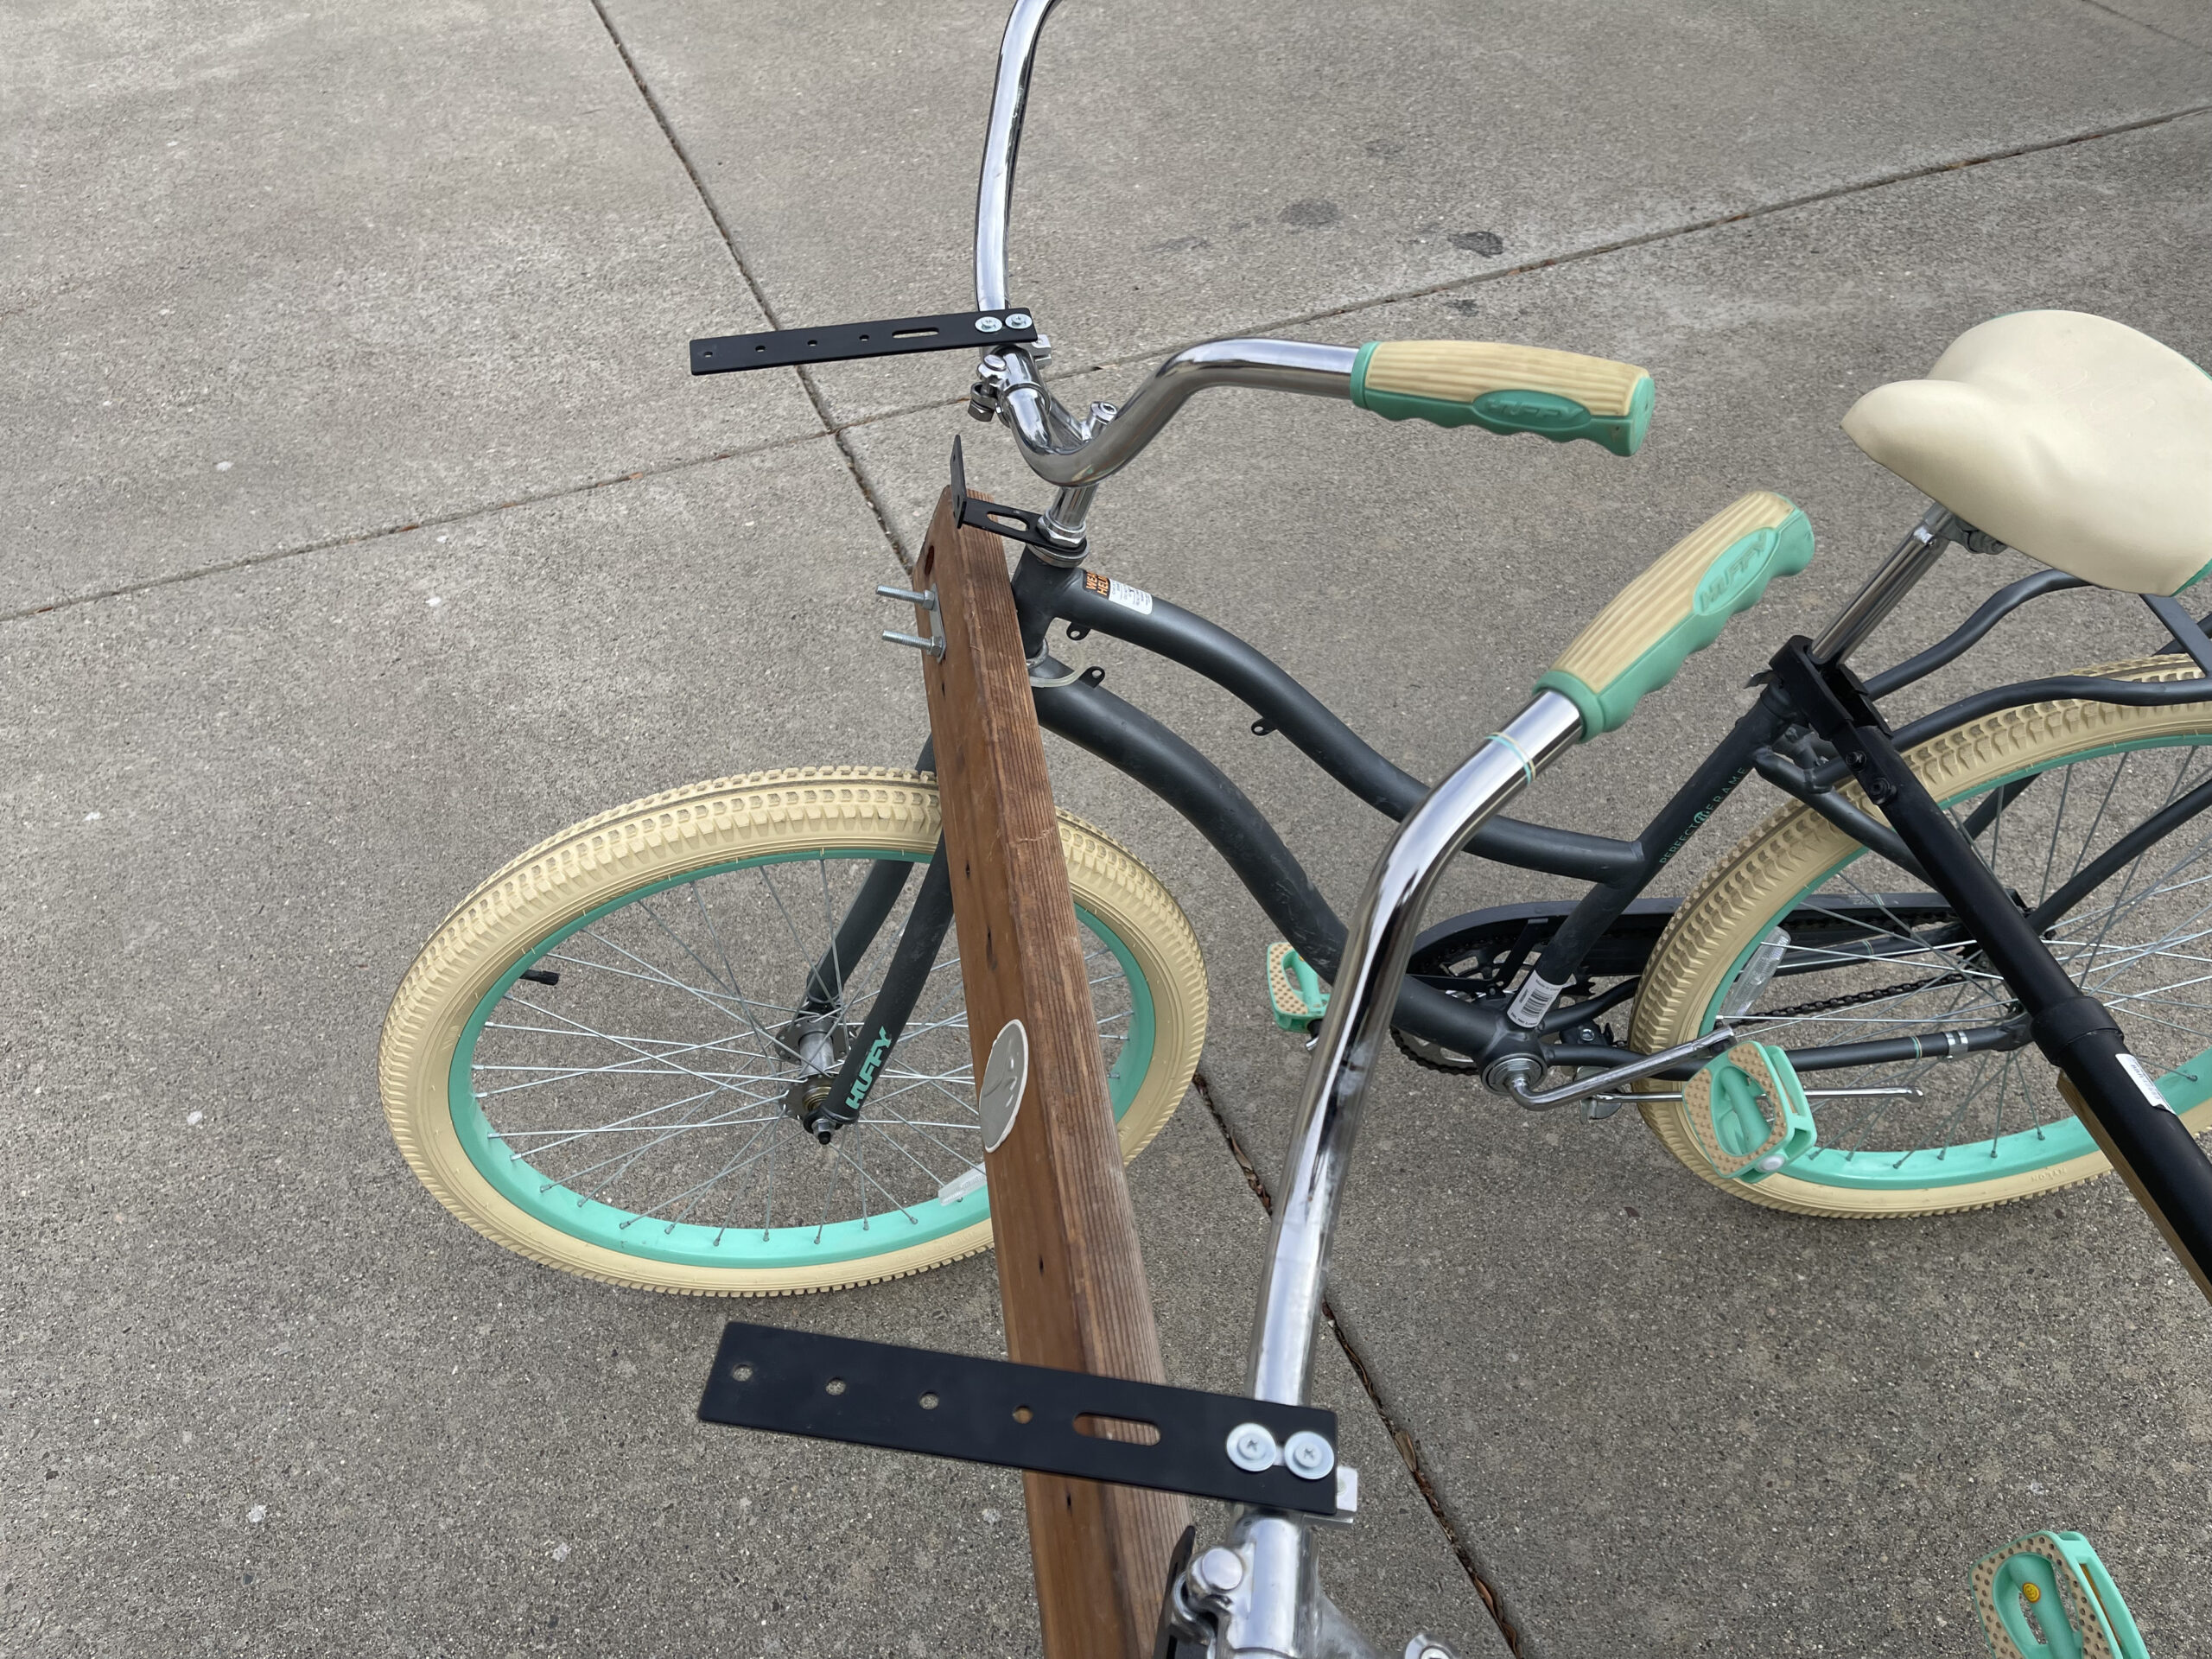
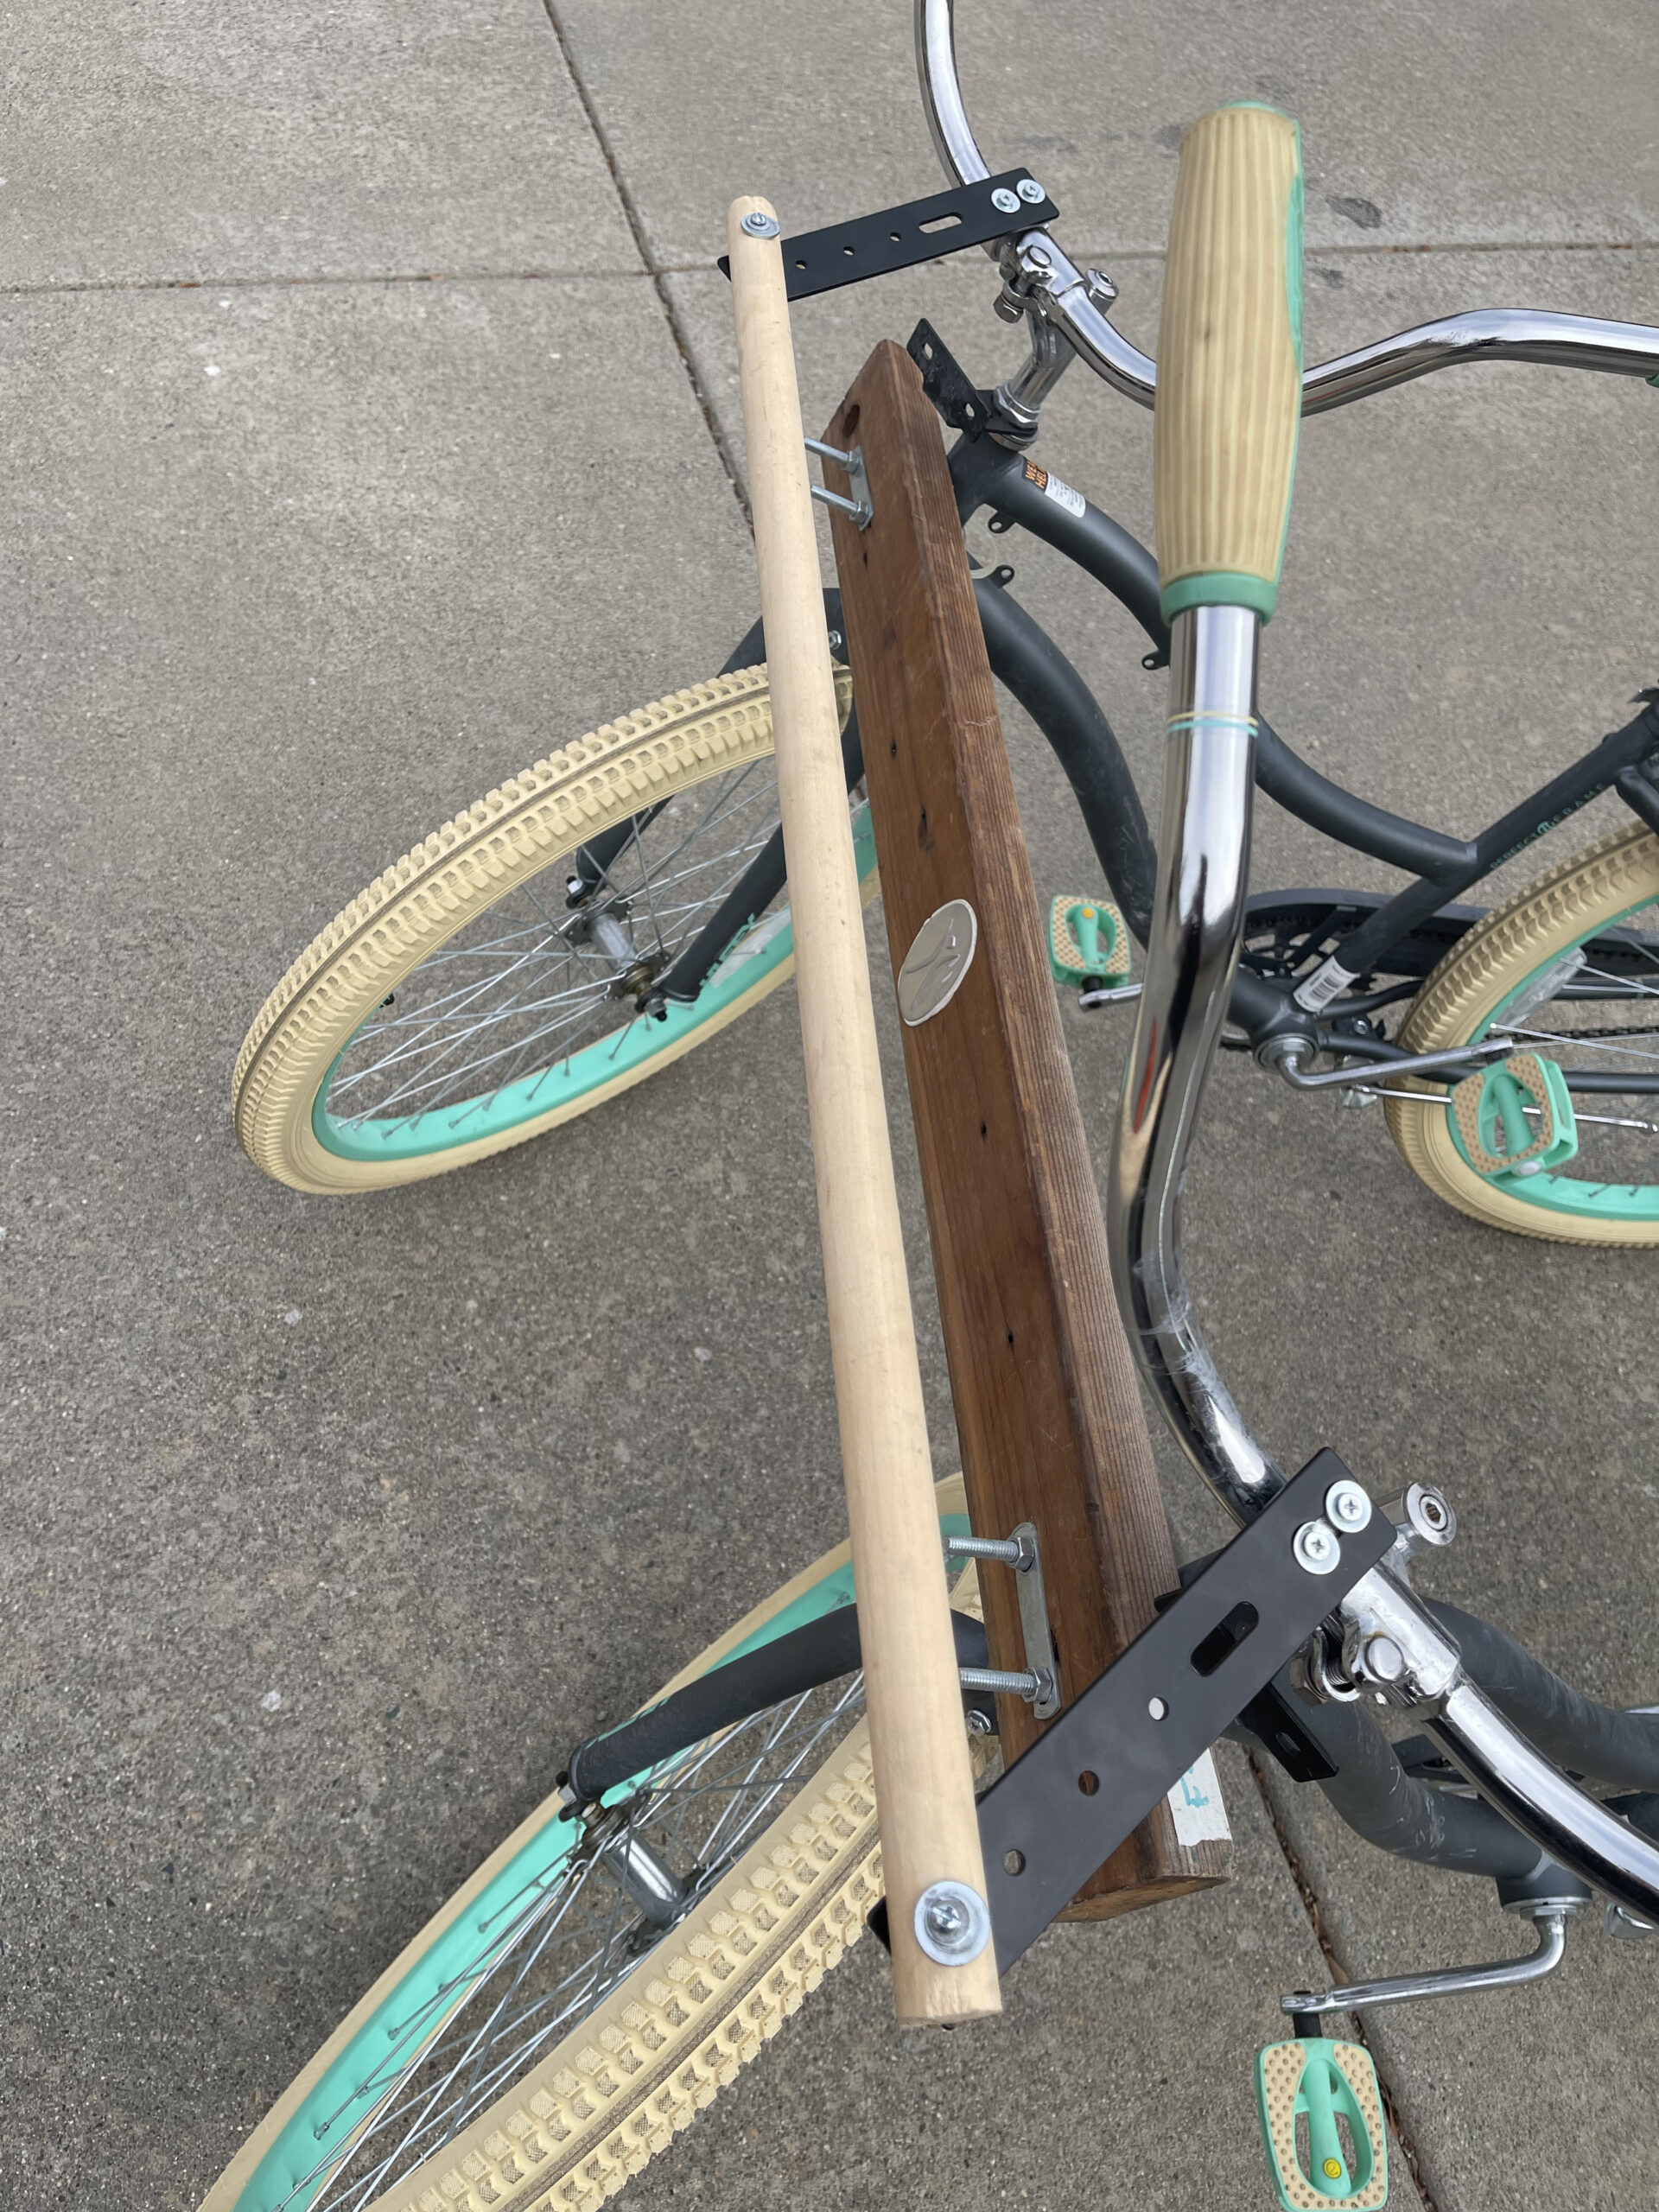
Then, cut your broom handle to length, put a couple of smalls holes in the broom handle with a hand drill, and drop the bolts in.
Put the broom handle across the mending plates, drop the bolts in and tighten them (not too tight), and you’re pretty much done! Note that since the nuts on those bolts are probably loose, you may want to put some electric tape or the like below the nuts so they don’t vibrate off while riding.
You built a cool bike!
And with that, you’re done! Tighten things up and give it a safe test ride, and enjoy!